
Under Settings › Users, you decide who has access to your Shopgate Admin. You create users, assign roles to them and activate or deactivate them. You define which permissions a role includes under Settings › Roles (see Roles & Permissions).
User list
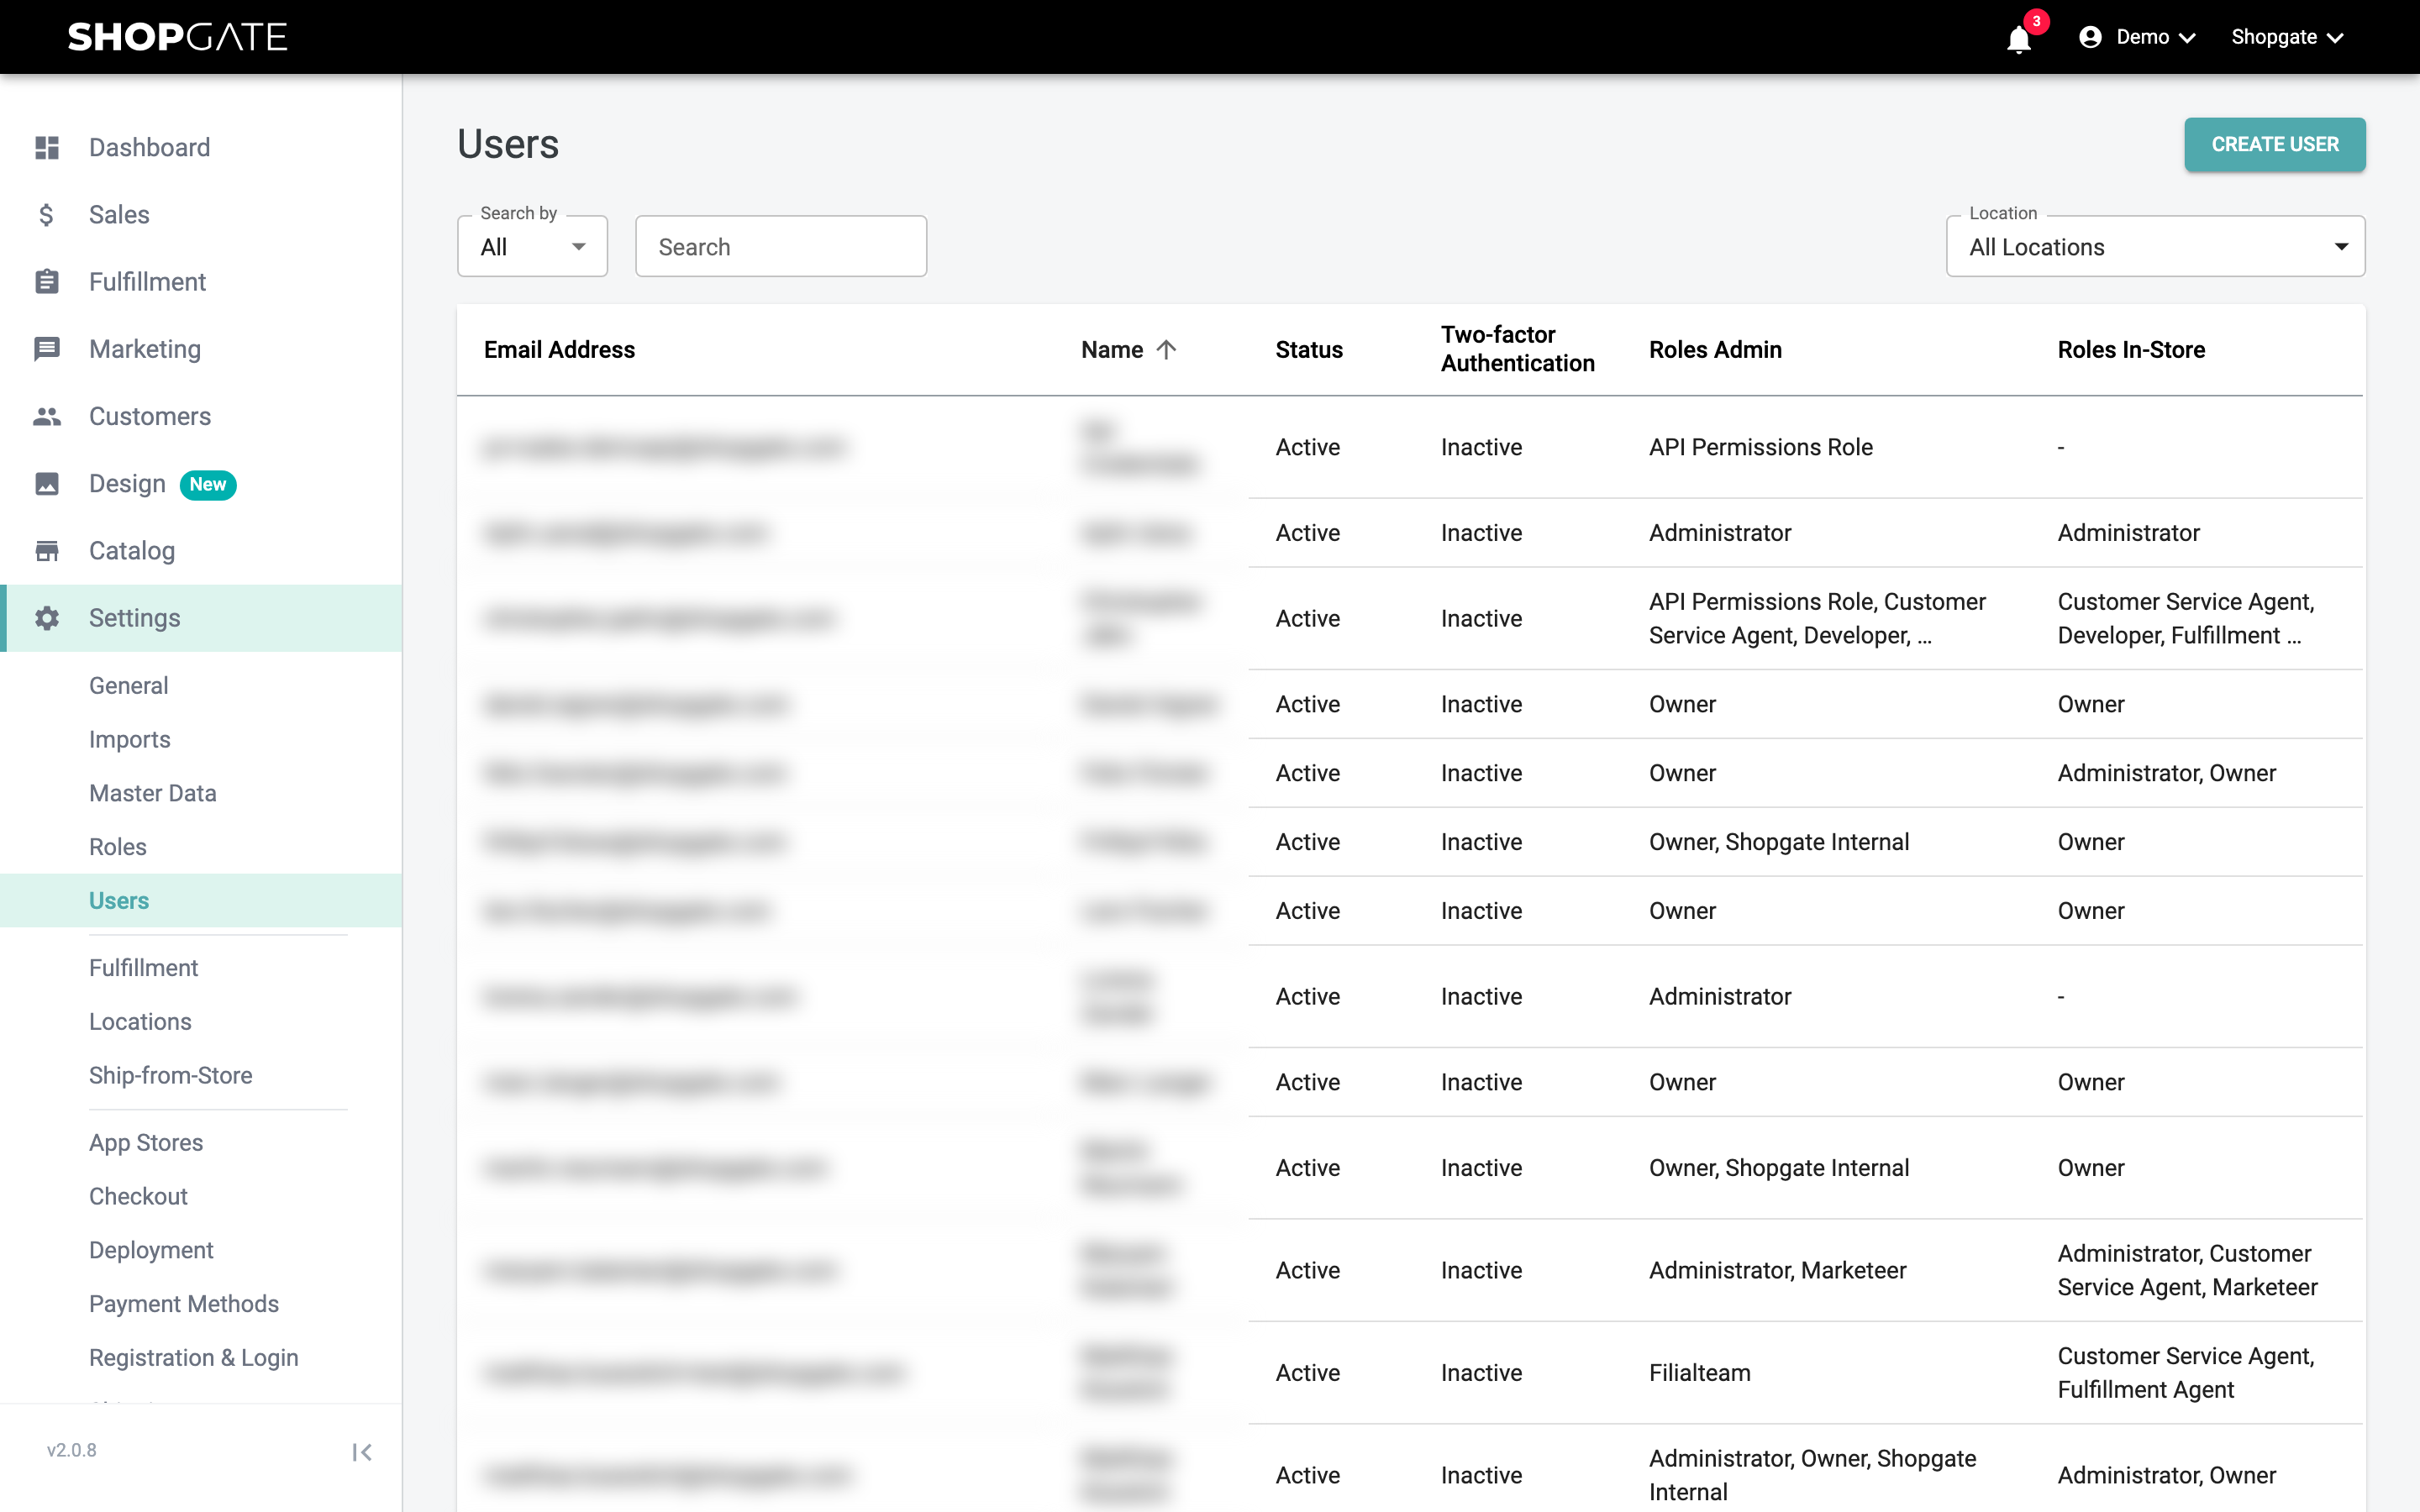
The list shows all users with the following columns:
| Column | Description |
|---|---|
| Email Address | The email address the user logs in with. |
| Name | First and last name. |
| Status | Active or Inactive. |
| Two-factor Authentication | Shows whether the user uses two-factor authentication (Active) or not (Inactive). |
| Roles Admin | The assigned roles of the type Administration. |
| Roles In-Store | The assigned In-Store roles. Only merchants with Shopgate Omnichannel see this column. |
Under Search by, choose whether to search by name, email or both fields (All), and enter your search term in the Search field. Use the Location field to show only users who have a role at a specific location.
Creating a user
- Click Create User.
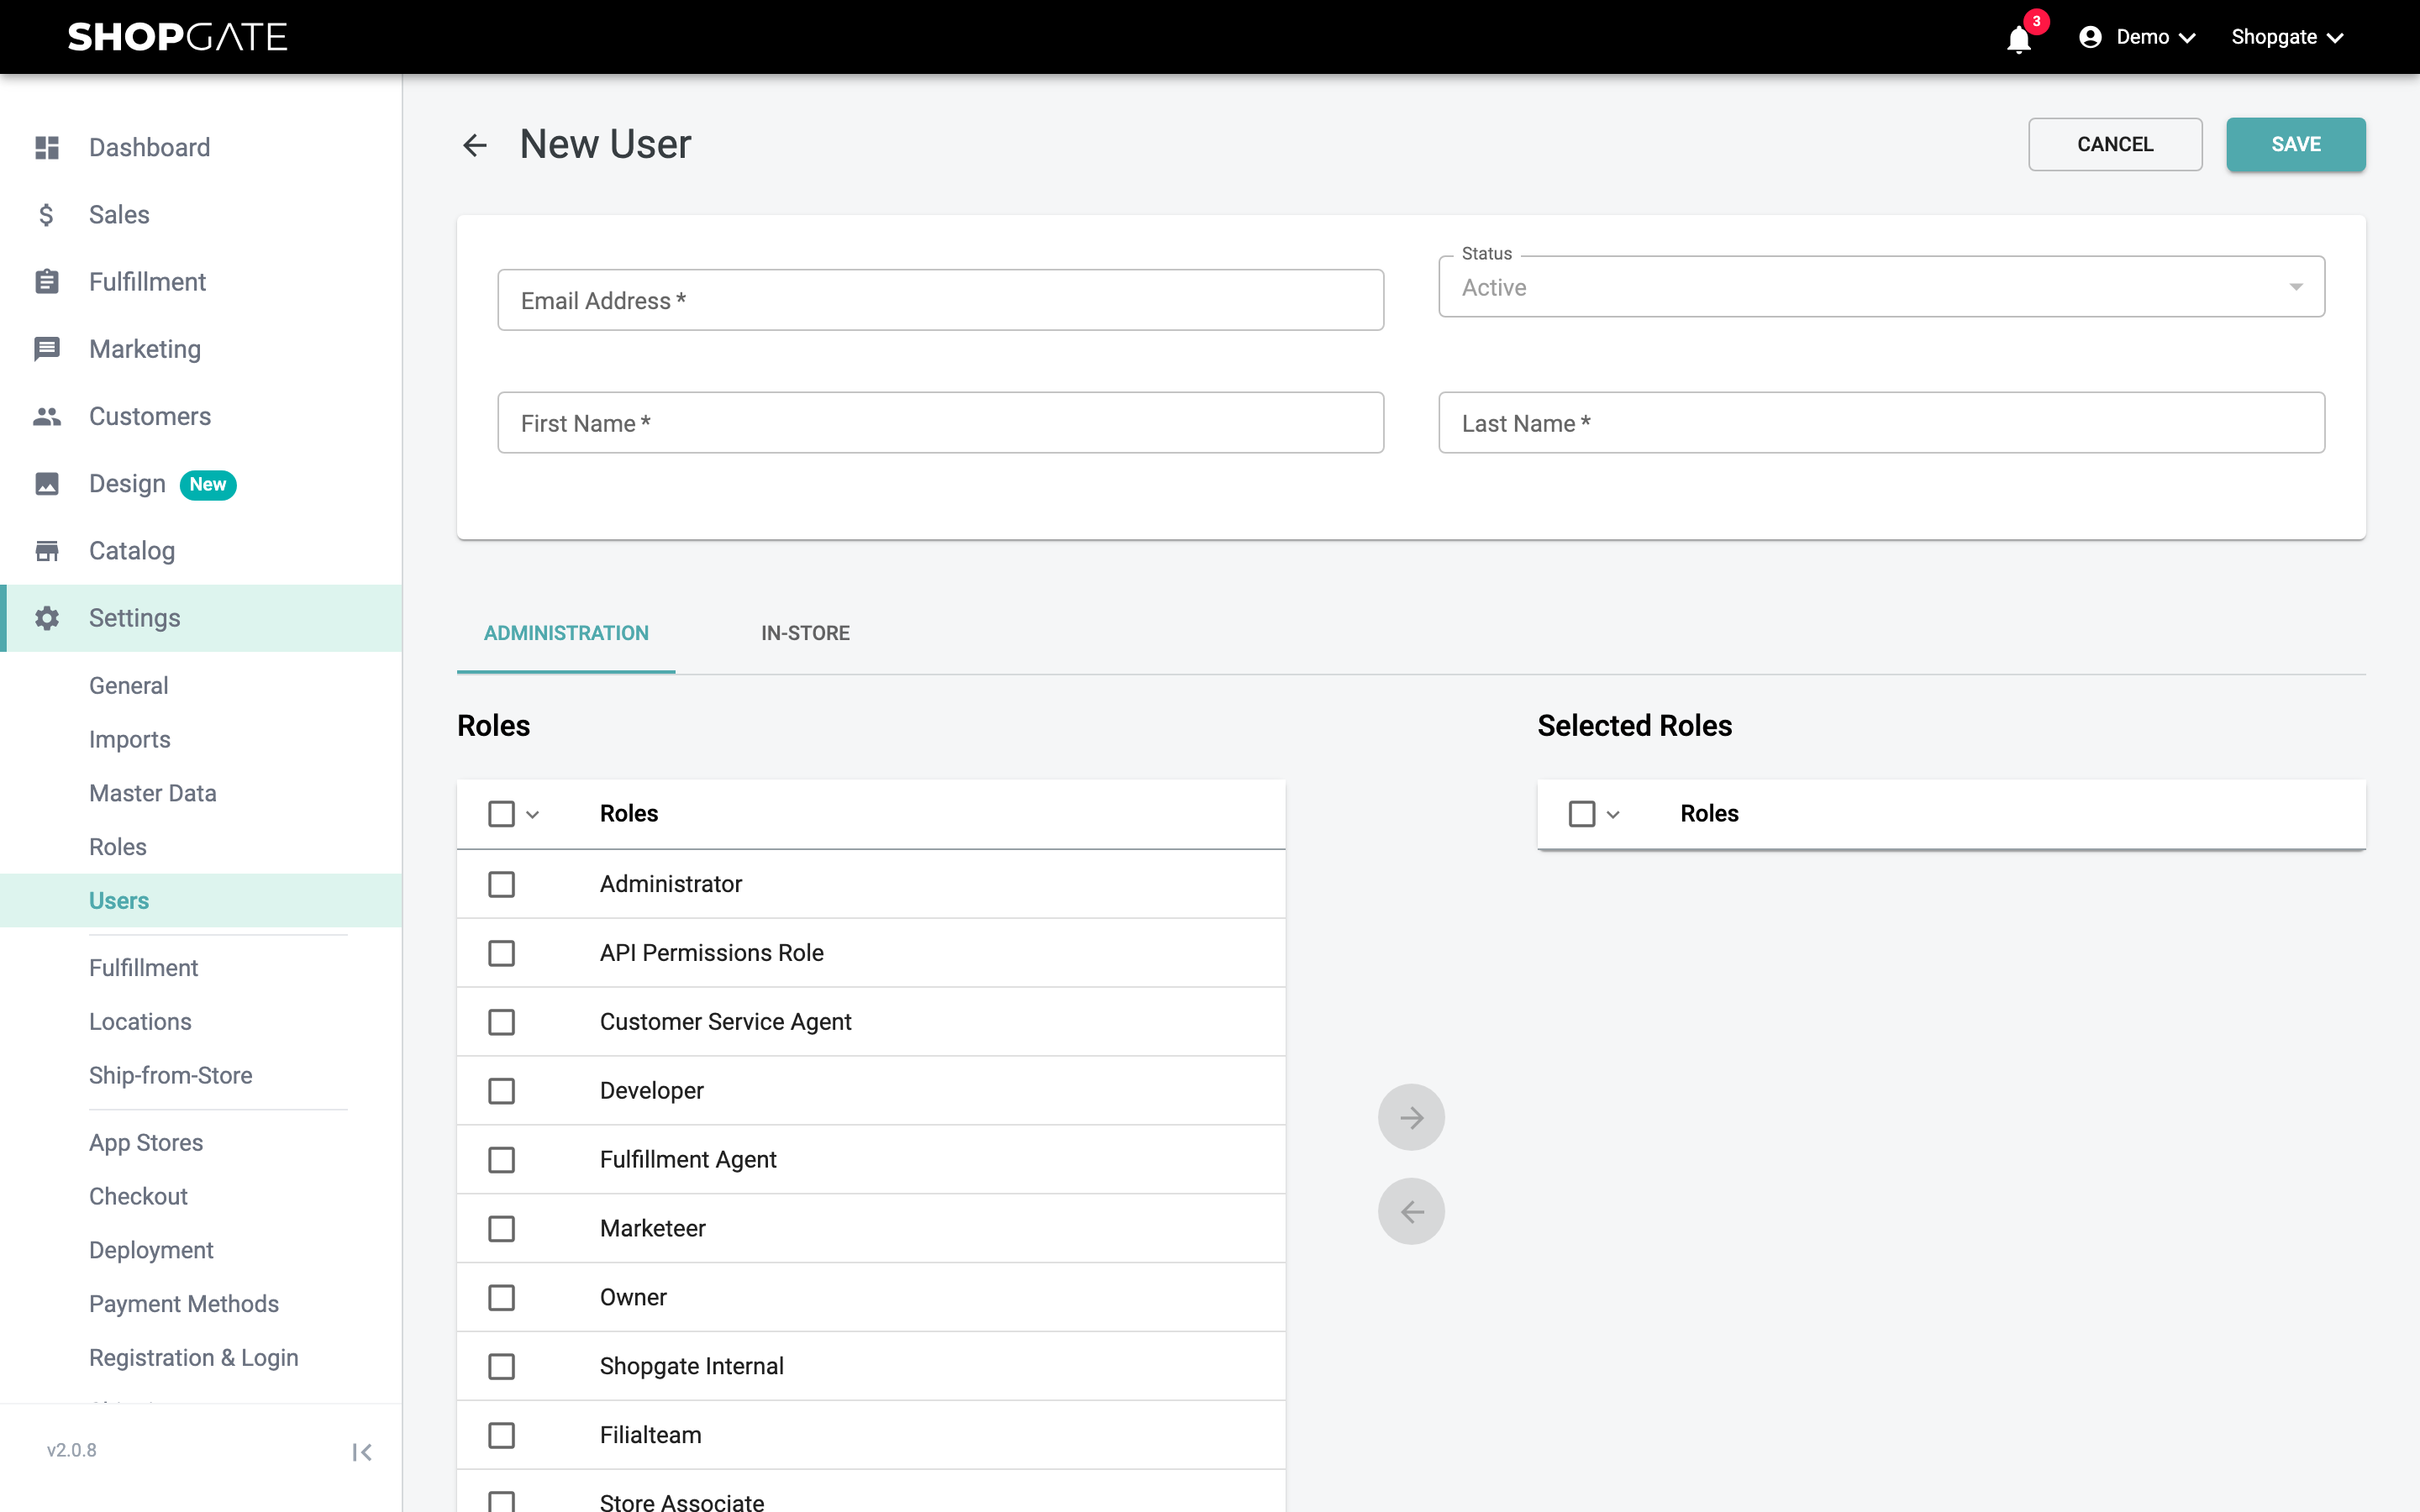
- Enter the Email Address, First Name and Last Name.
- Assign at least one role to the user (see below).
- Click Save.
The new user receives an invitation by email. Using the link in it, they set their password and can then log in to the admin.
New users are always active. A user cannot be saved without a role. If a user with that email address already exists, you will see a corresponding message.
Assigning roles
In the Roles list, select the roles you want and click the right arrow. The roles appear under Selected Roles. Use the left arrow to remove selected roles again. Inactive roles are marked "(disabled)".
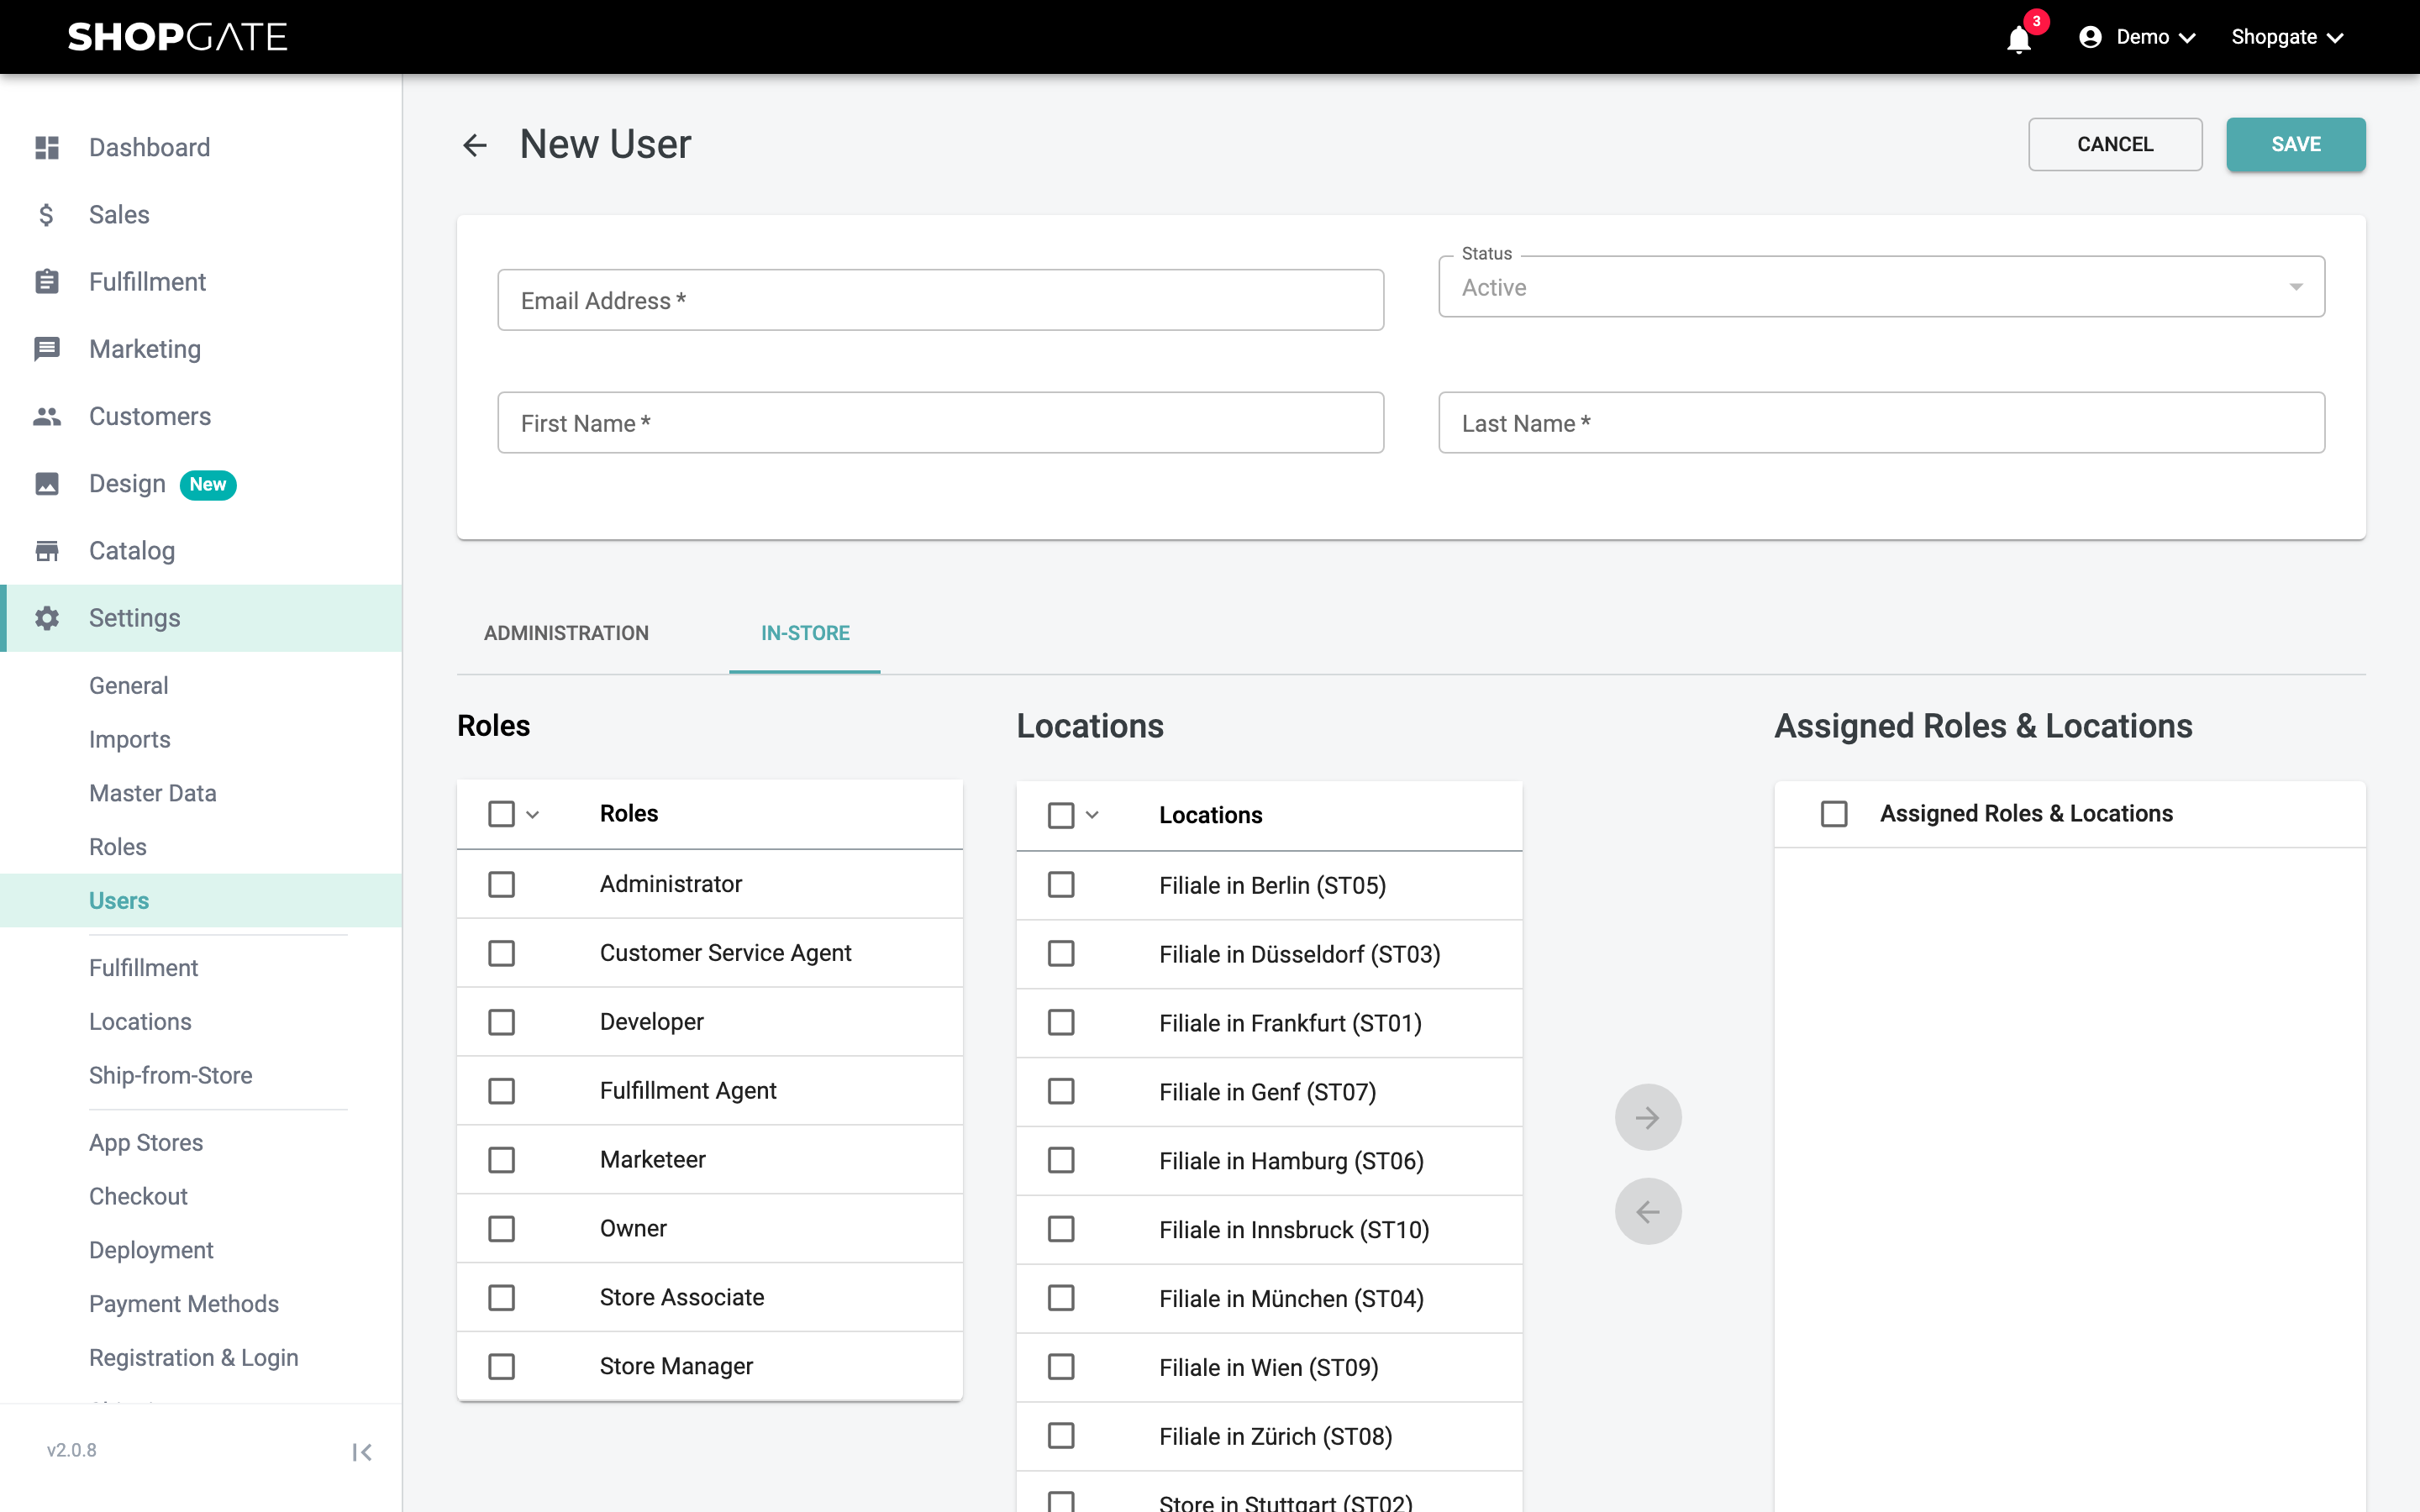
For Omnichannel merchants, there are two tabs:
- ADMINISTRATION: roles for the admin, as described above.
- IN-STORE: roles for the store. Select one or more Roles and one or more Locations and click the right arrow. Under Assigned Roles & Locations, you can see the assigned roles for each location. Expand a location to select individual roles and remove them again with the left arrow.
Editing and deactivating users
Click a user in the list or click the pencil icon. For existing users, you can change the Status and the assigned roles. The email address, first name and last name cannot be changed here. To revoke a user's access, set the status to Inactive and click Save.
You will also see:
- Number of Failed Login Attempts
- Date of Last Password Change
- Last Logged In
Resetting a password
If a user has forgotten their password, open the user and click Reset Password. Confirm with Reset. The user then receives an email with a link to set a new password.
Deleting a user
Click the trash icon in the list, or open the user and click Delete. Confirm the prompt with Delete.