
After integrating the Shopgate plugin into your Magento 2 shop, the following features are available for your app and mobile website:
| support | Import to Magento 2 | ||
| version | 2.1+ | orders | ✔ |
| customer account | Export to Shopgate | ||
| Login with desktop shop account | ✔ | Products | ✔ |
|
Login with mobile account |
✔ | categories | ✔ |
| Customer groups/scaled prices | ✔ / ✔ | reviews | ✔ |
| View desktop order history on mobile | ✘ | ||
| sync | Live cart validation | ||
| Delivery status "sent" | ✘ | Vouchers* | ✔ |
| Order status "cancelled" | ✘ | shipping methods | ✔ |
| Inventory quantity (product detail page) | ✔ | Payment Methods | ✘ |
| product availability | ✔ | ||
| Natively supported payment methods | Hints | ||
|
|
||
Install the Shopgate plugin
First steps
To prevent your shop from being temporarily unavailable during the plugin installation, you should take the following measures. To do this, log in to Magento 2.
| Before installing or updating the Shopgate plugin: | |
|
✓ Disable Magento cache if enabled ✓ Disable any external caching (e.g. Varnish, APC, ZendCache) if enabled |
|
| After installing or updating the Shopgate plugin: | |
|
✓ Re-enable Magento cache ✓ Clear internal cash and all external caches |
|
Download the Shopgate plugin
Download the Shopgate plugin for Magento 2 from GitHub. There are three parts of the plugin:
Alternatively, you can install the extension via Composer - our component name is " shopgate/cart-integration-magento2-m2 ". More information about this method can be found here .
Connect the plugin to Shopgate
Once the Shopgate plugin has been installed, follow these steps to connect your mobile shop to Magento 2.
- Log into your Shopgate admin area .
- Go to Integration → Install Interface .
- Under "New Connection" look for Magento 2 in the drop-down menu and select it when it appears.
- A pop-up window will then open.
Get API credentials
Copy your API access data ( customer number , shop number , API key and alias) from the pop-up window and paste them one by one into the plugin configuration in your "Magento 2 Admin Panel" ( Stores → Settings → Configuration ).

You can add the remaining plugin settings later. This is explained in the chapter " Understanding the plugin's settings ".
Connect your shop to Shopgate
Enter under 2 . Enter URL enter the URL of your shop. Click Connect to set up the interface.
If the connection is successful, a pop-up window will open (see above). Leave all settings enabled (ON) as default. How to use all features. Then click on Save .
That's it! The product data is now automatically imported via the newly set up interface.
Explanation of the plugin settings
In this chapter we will explain all the options available to you for setting up your Shopgate plugin in Magento 2.
|
|
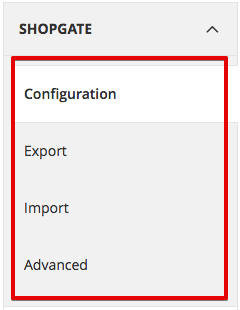
To find the Shopgate settings, follow these steps:
|

| Basic configuration | |
| Enabled | Choose Yes to activate the Shopgate plugin in your Magento 2 backend. |
| Customer number | Your customer number at Shopgate. |
| Store number | Your shop number at Shopgate. |
| API key | Your API key generated at Shopgate. This key is used to authenticate your account between Shopgate and Magento. |
| Mobile settings | |
| RedirectType | Choose your redirect type: HTTP or JavaScript. HTTP is recommended as it is more SEO friendly. |
| site alias | Your Shopgate alias |
| CustomURL | A URL used for the mobile version of your store. By default it is [alias].shopgate.com, an alternative could be m.[alias].com. |
| CMS map | This feature allows mapping from a Magento 2 CMS page to a CMS page created in your Shopgate admin. Provide the URL key that the CMS page uses in Shopgate . |
| Categories | |
| Force export disabled categories | List comma separated category ids (e.g. 1,4,6,34) to be exported even if they are disabled. |
| In navigation only | Export the categories that only have the "Include In Navigation" selected. |
| Products | |
| Description | Choose how you want to export your descriptions: Short Description, Description + Short Description, Short Description + Description. |
| EAN attributes | Choose the attribute used for the EAN from the list. |
| Miscellaneous | |
| Net Market Countries | Choose the predefined value of Magento 2 or choose the countries where your product prices are pre-tax defined (e.g. United States) |
| order | |
| Send to email to customer on new order | For each order import, the customer receives an order confirmation e-mail after the import. This flag should be set in conjunction with the 'send confirmation mail' flag in the Shopgate merchant area. |
| Shopgate Shipping Carrier Title | This text field allows merchants to define a shipping title for each shipping method that Shopgate manages. This shipping title will be used in emails and order details. |
| staging | |
| Shopgate servers | Select the Shopgate "Live" server. Use the other options for debugging purposes only. |
| Shopgate Merchant API URL | This field is only used if the Shopgate server is set to “custom” and is only used for debugging purposes. |
| .htaccess user | .htaccess user and .htaccess password are only used to bypass additional htaccess authentications. |
| .htaccess password |
Frequently Asked Questions
How to disable or clear internal cache in Magento?
If you want to disable or clear Magento cache to install or update Shopgate plugin, follow these steps. Remember to re-enable the configuration cache after installing or updating the plugin.
- Go to System → Tools → Cache Management .
- Click Flush Magento Cache to flush Magento cache.
- To temporarily disable the Magento cache, select Configuration , then set "Action" to Disable and click Submit .

The Magento cache has now been cleared and disabled.