
| Available for the following platforms : | |||
| Shopgate Connect | ✔ | Shopgate Go | ✘ |
Overview
In order to be able to send Push Notifications to your Engage App, you need to do some configuration and upload files to the Shopgate Admin. This guide will explain you what you need to do.
requirements
- You need access to the Shopgate Admin
- You need to have a Google account
Step 1: Create Firebase Project
Go to the Firebase Console and log in with your google account. Create a new Firebase project for your app (you can follow the instructions from google: how to create a new Firebase project ).
Step 2: Enter Firebase Server Key
In Firebase click on ⚙️ next to your project -> Project Settings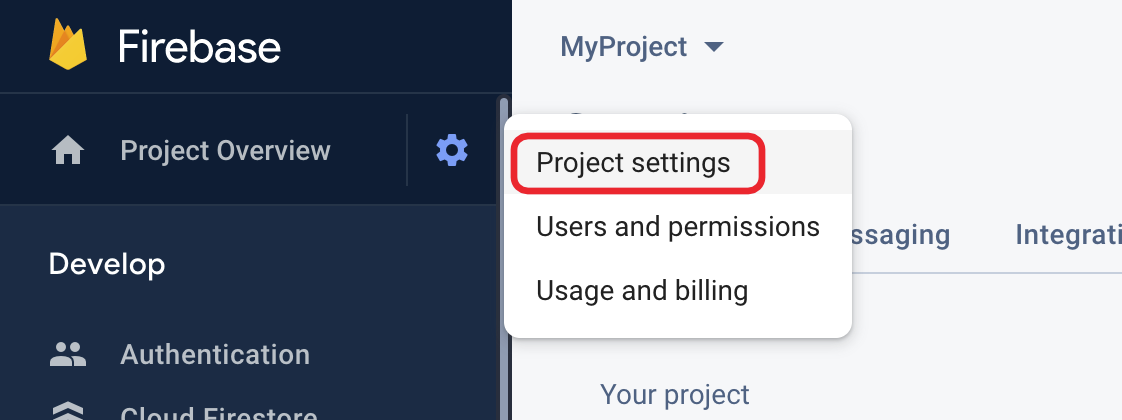
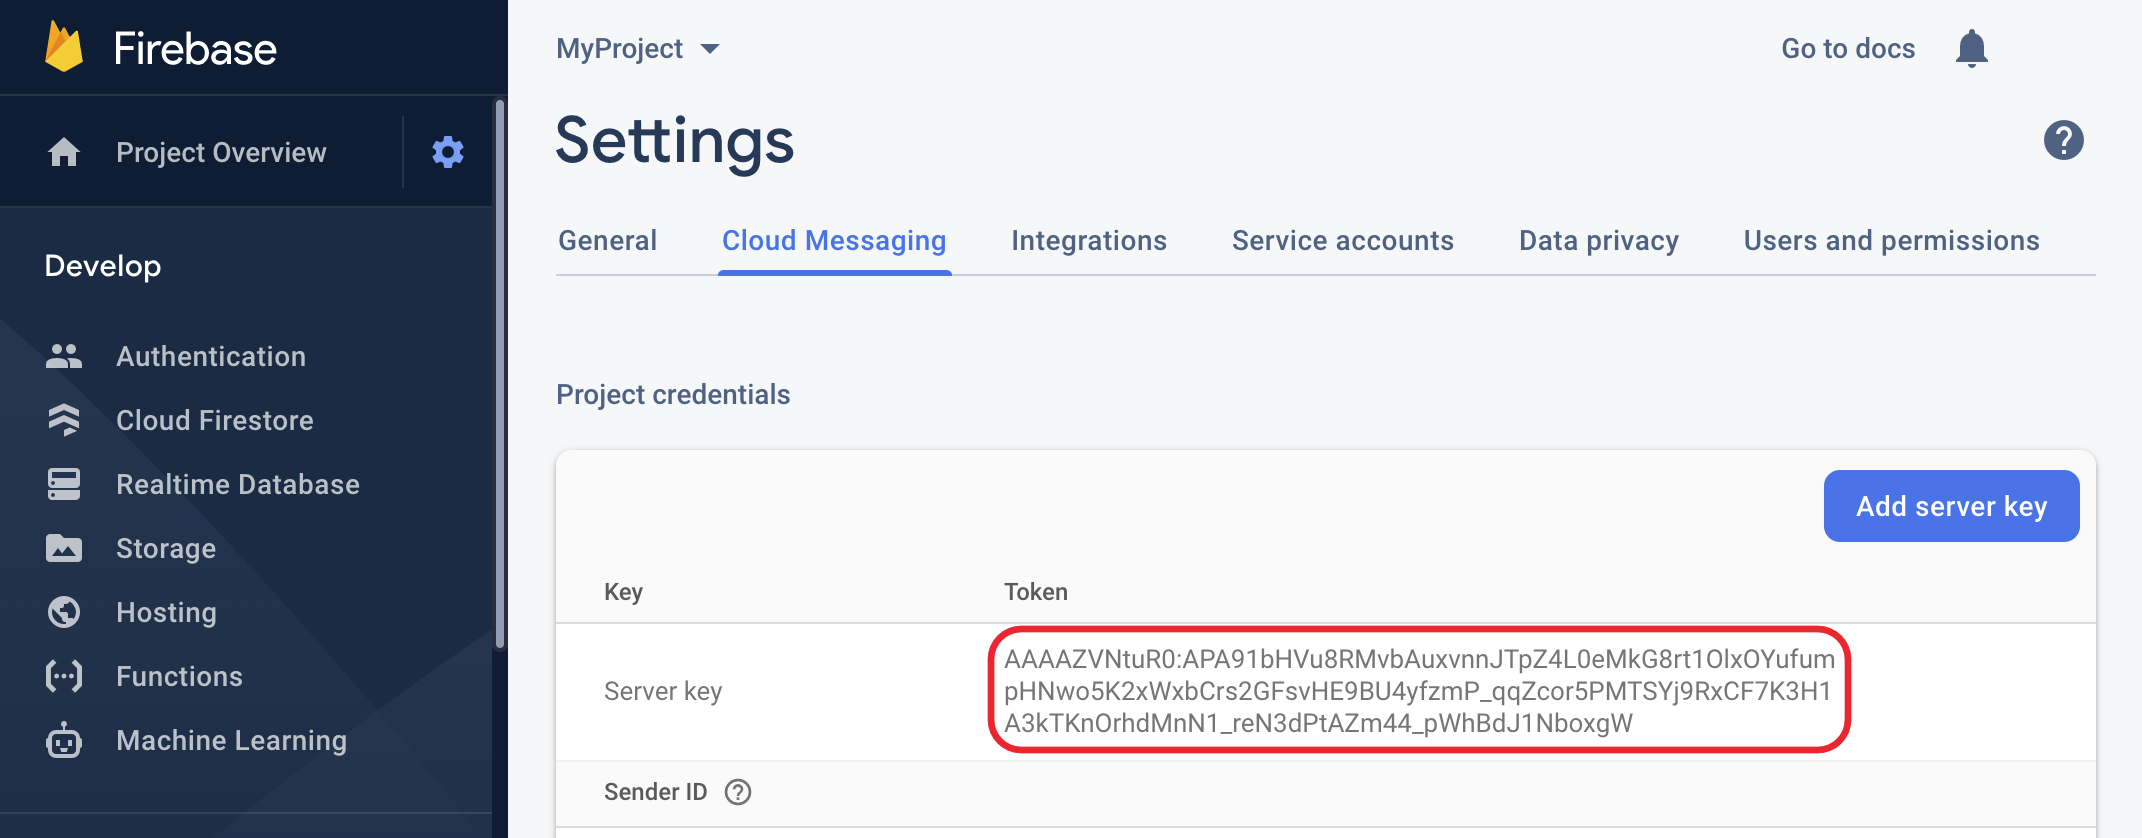
Go to the "Cloud Messaging" tab and copy the Server key
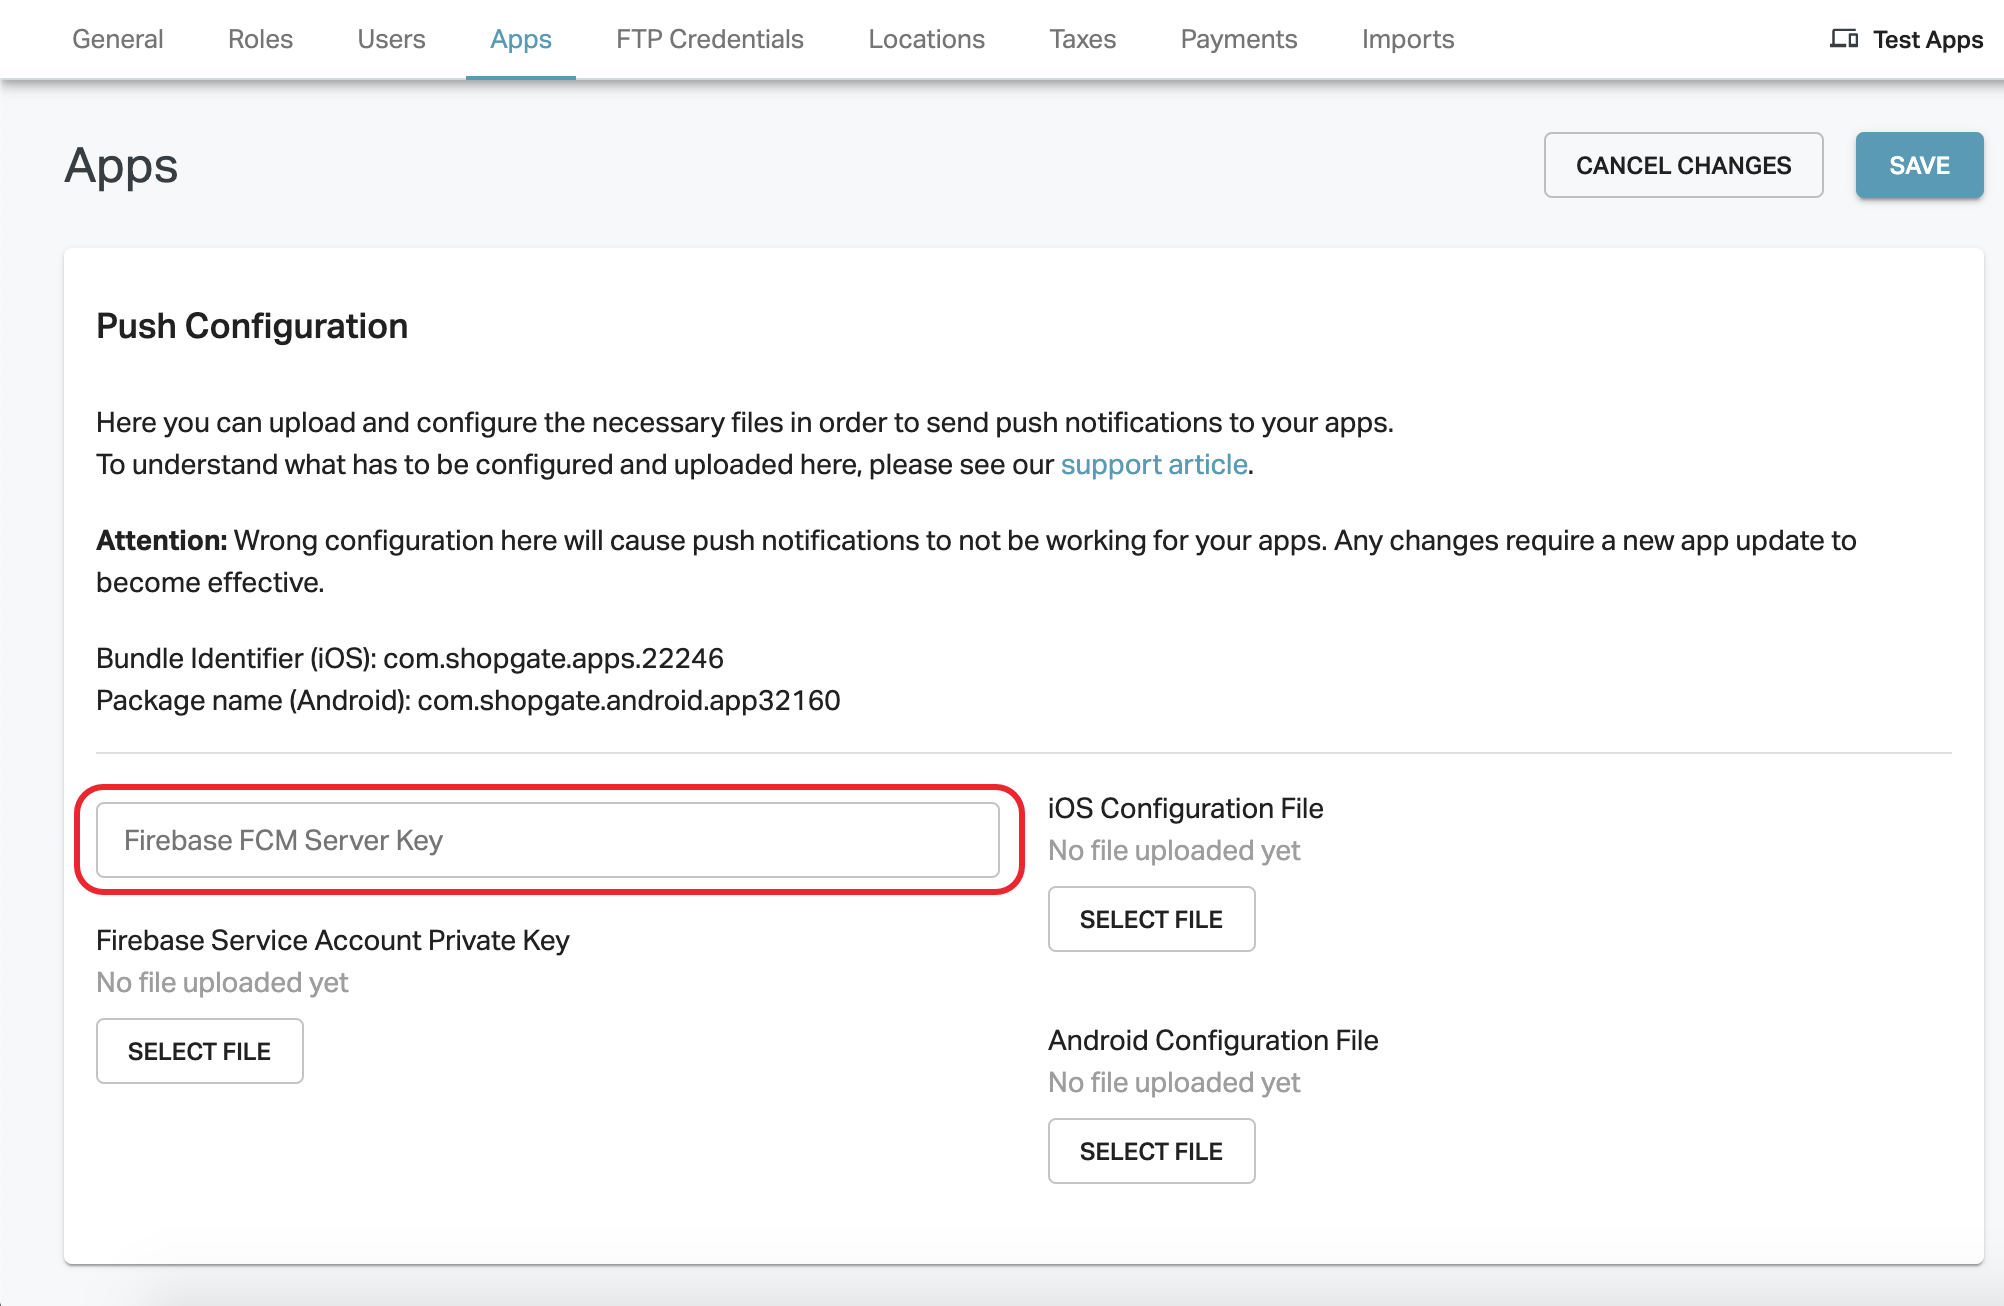
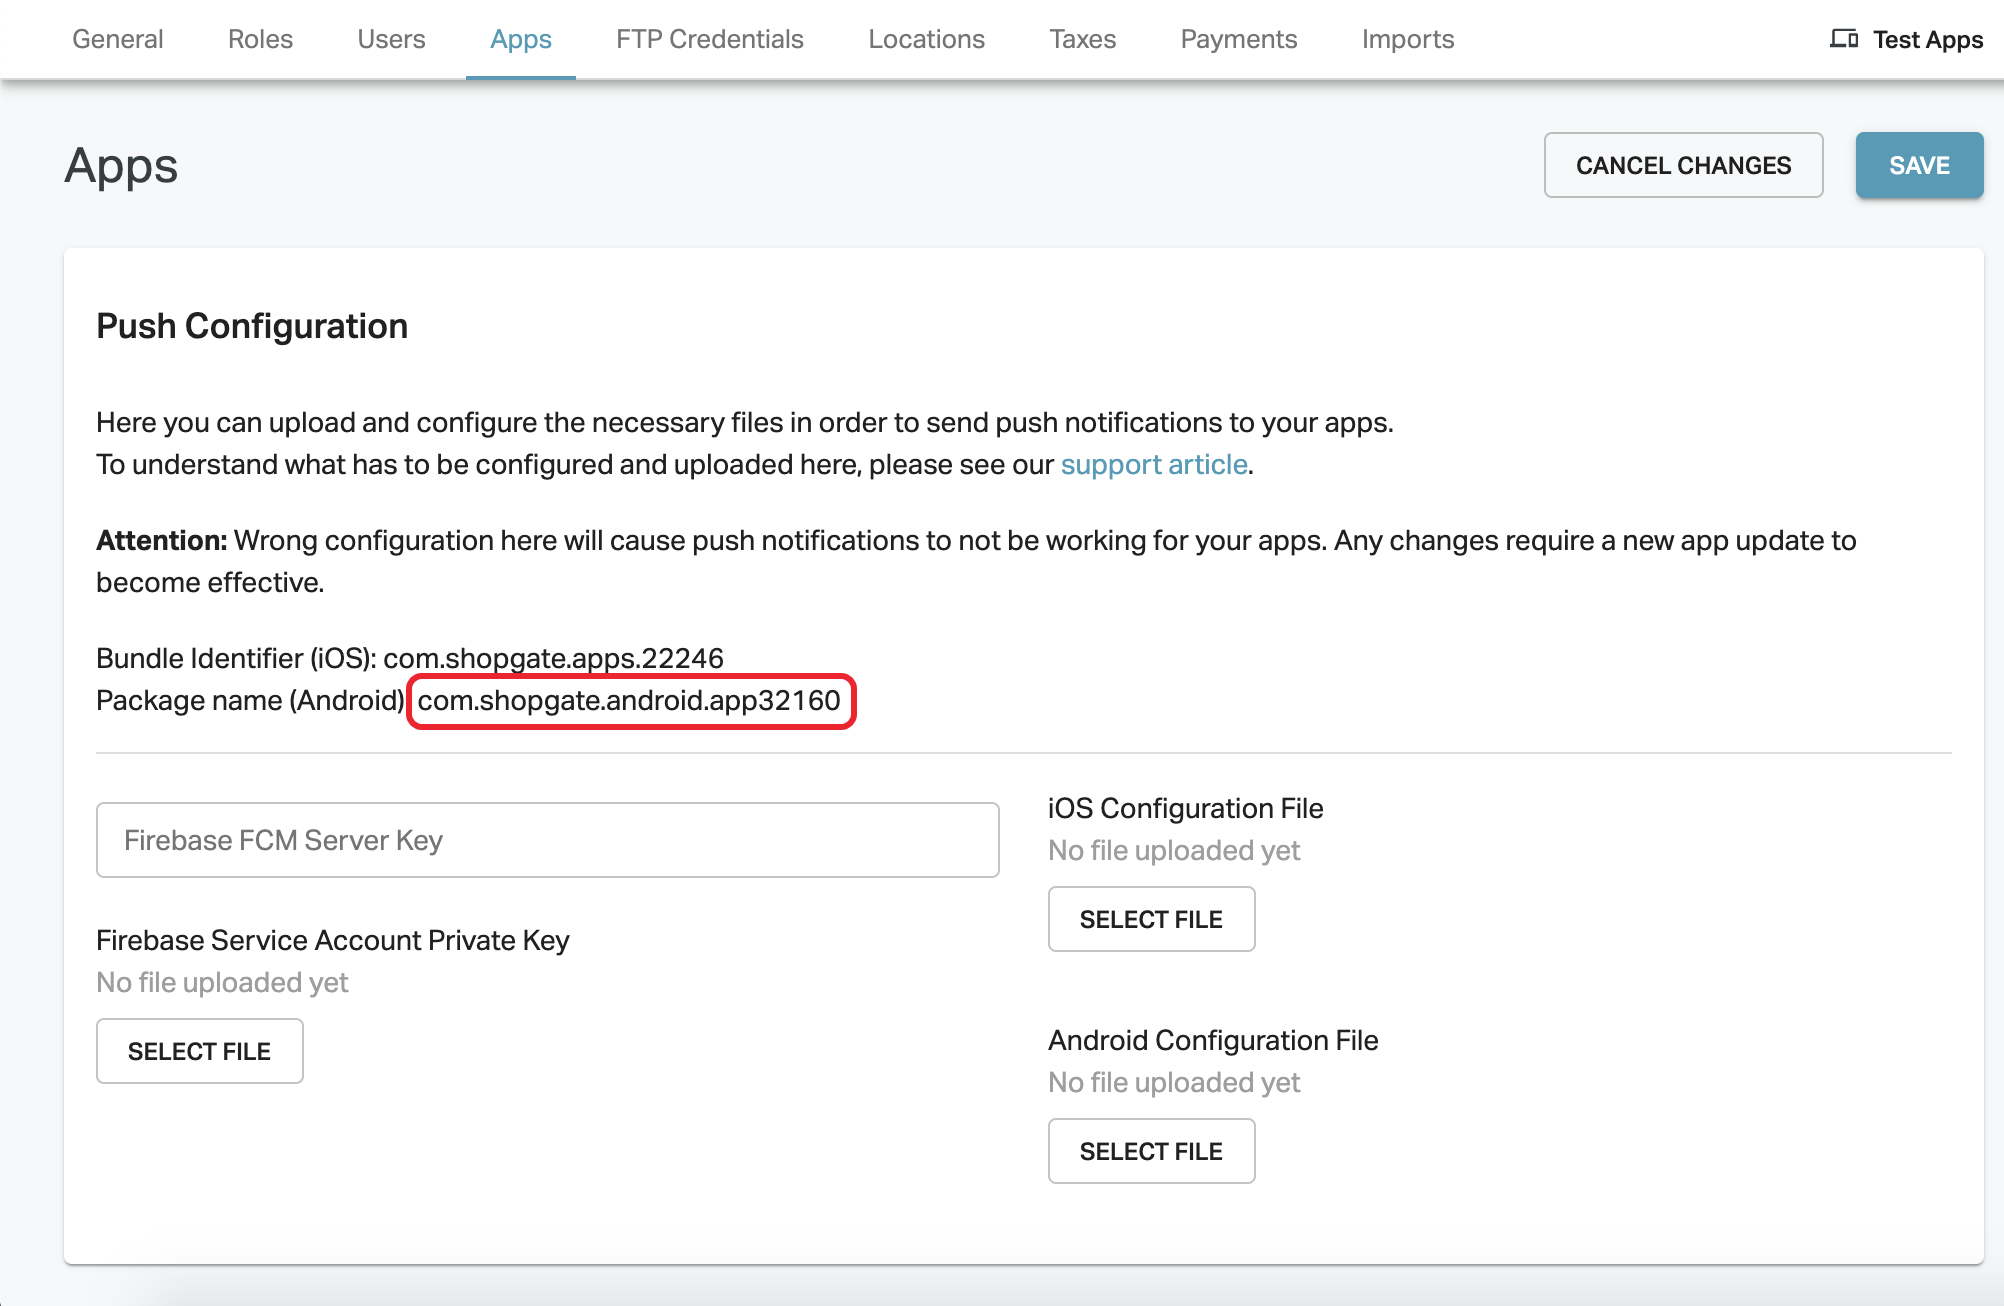
In the Shopgate Admin, go to Settings -> Apps. Paste the Server key into the "Firebase FCM Server Key" field and press save on top right.
Step 3: Enter Firebase Service Account Private Key
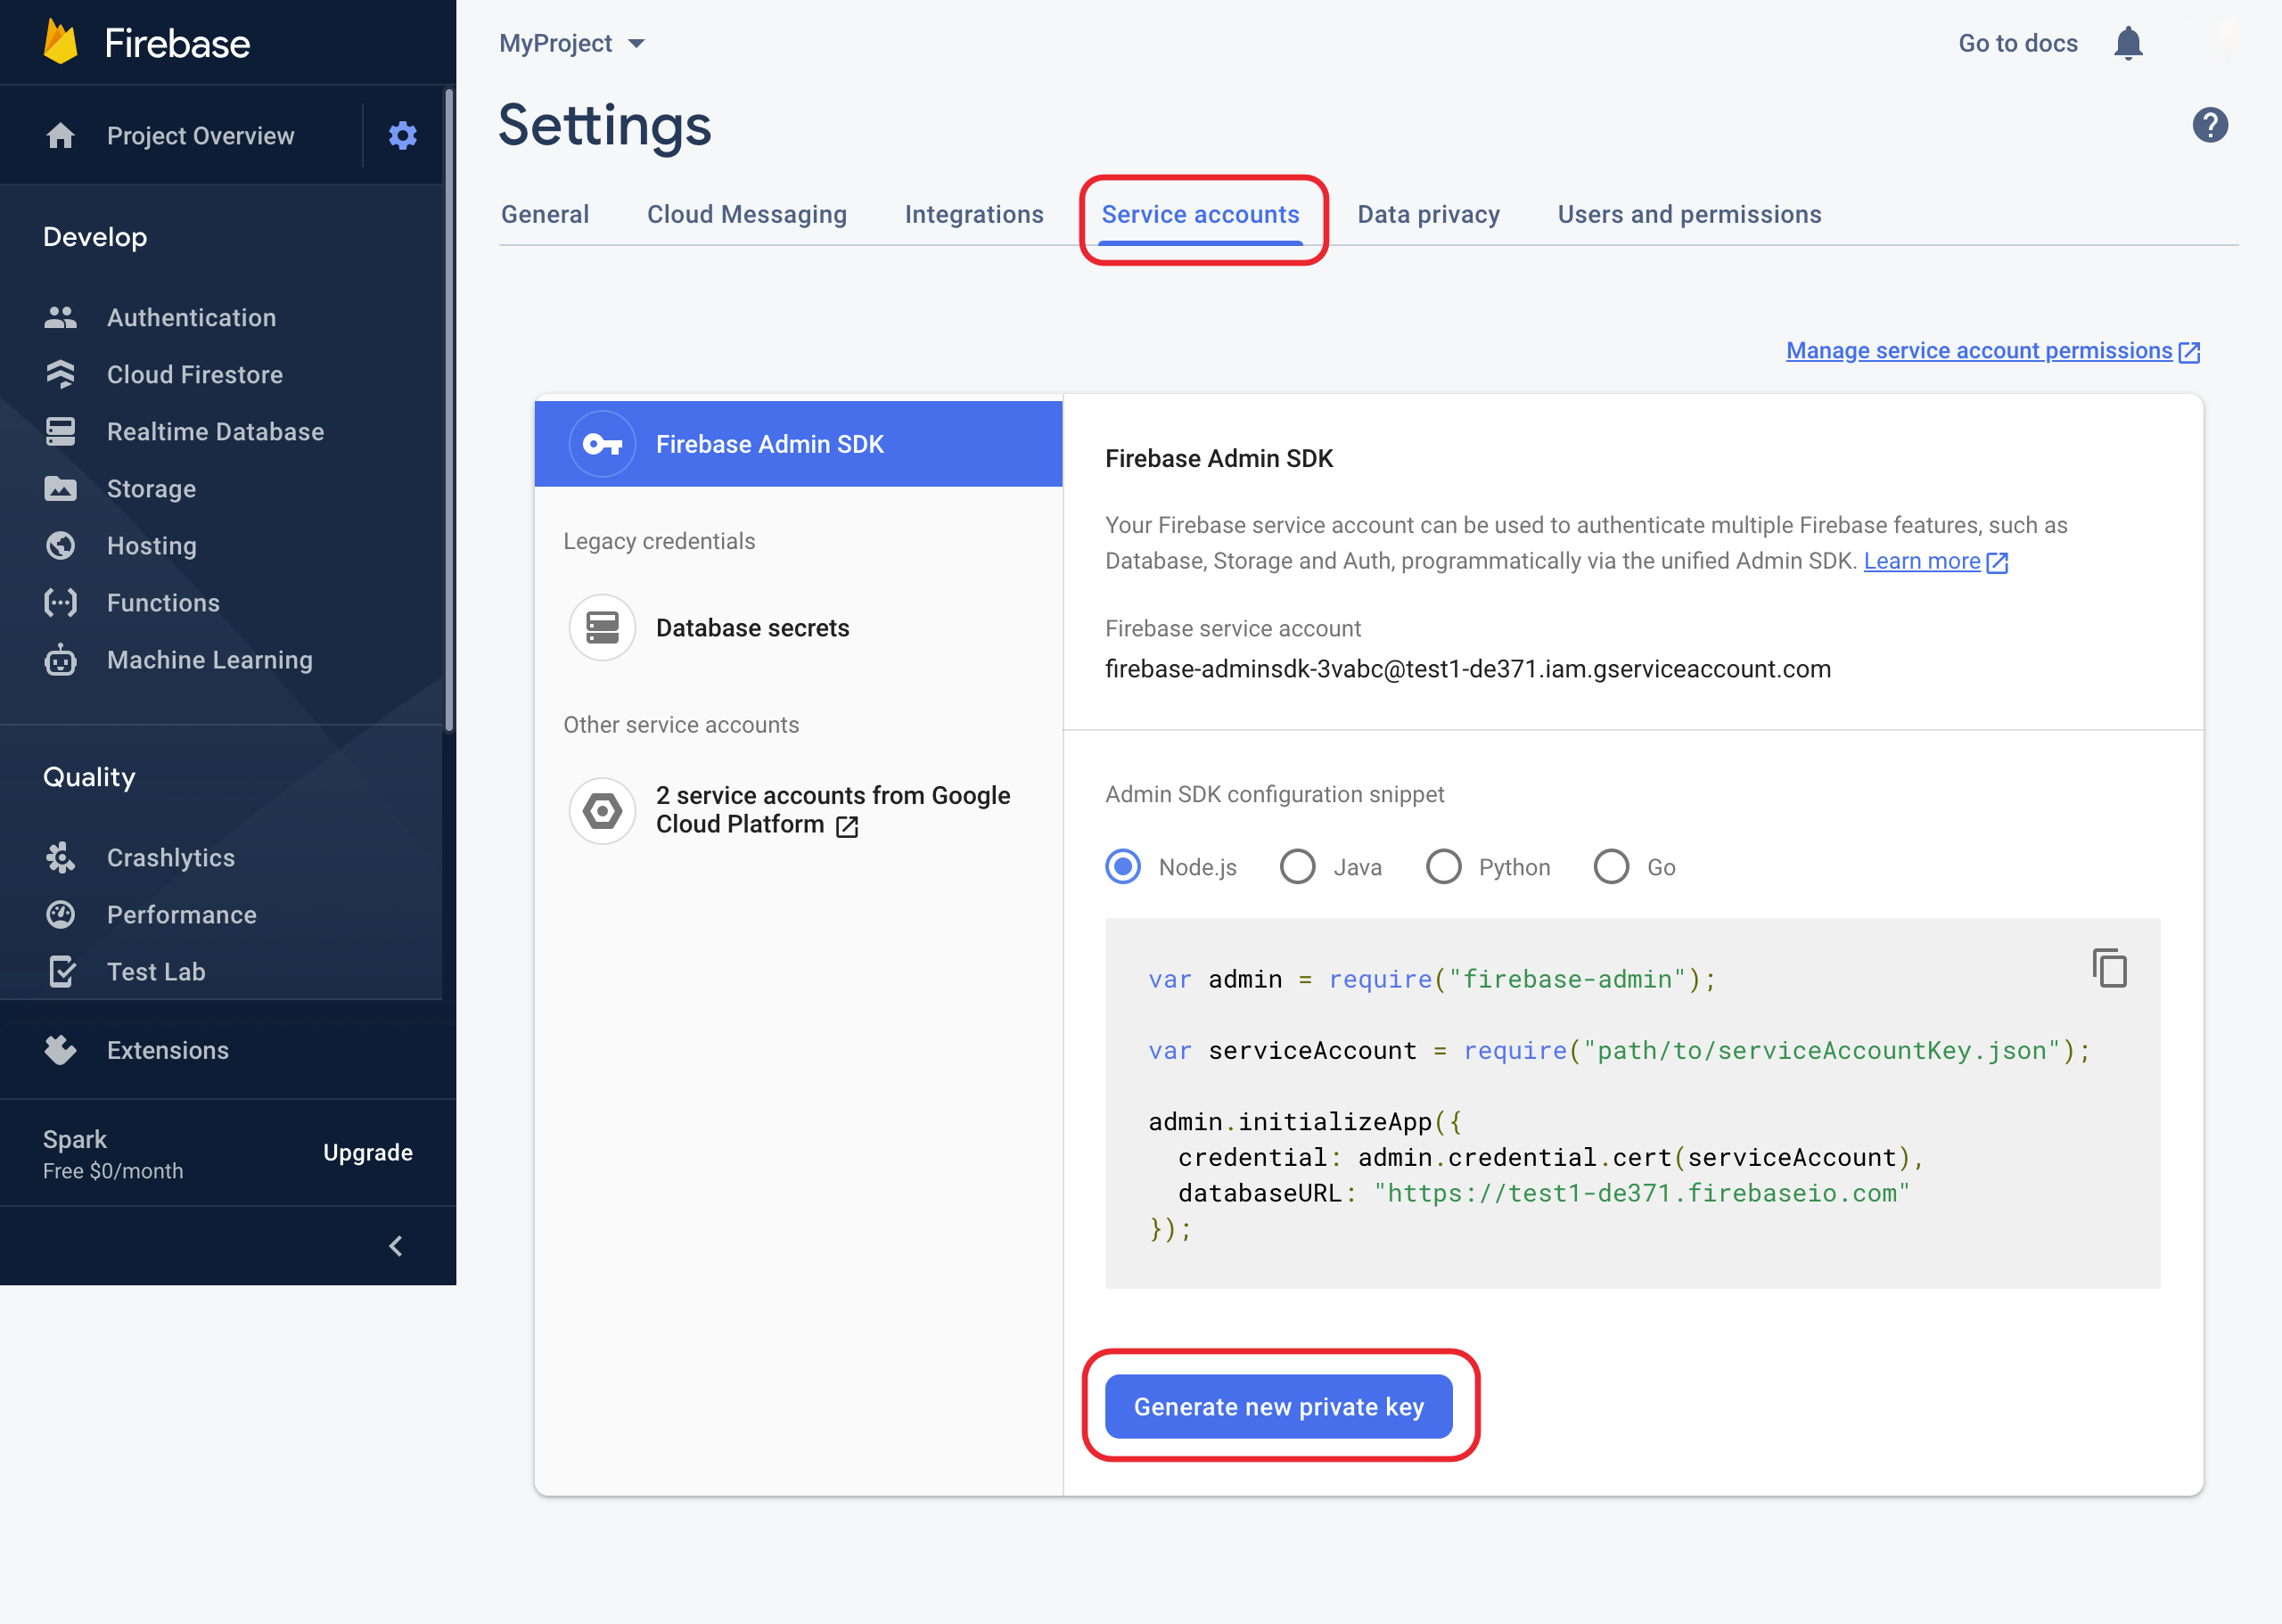
In the Project Settings in the Firebase console, click on the "Service Accounts" tab. Then scroll down and click on "Generate new private key" at the bottom.
A new private key will be generated and a download prompt will open. Save the file on your computer.
In the Shopgate Admin, upload the file you just downloaded to the field "Firebase Service Account Private Key". Click Save on top right.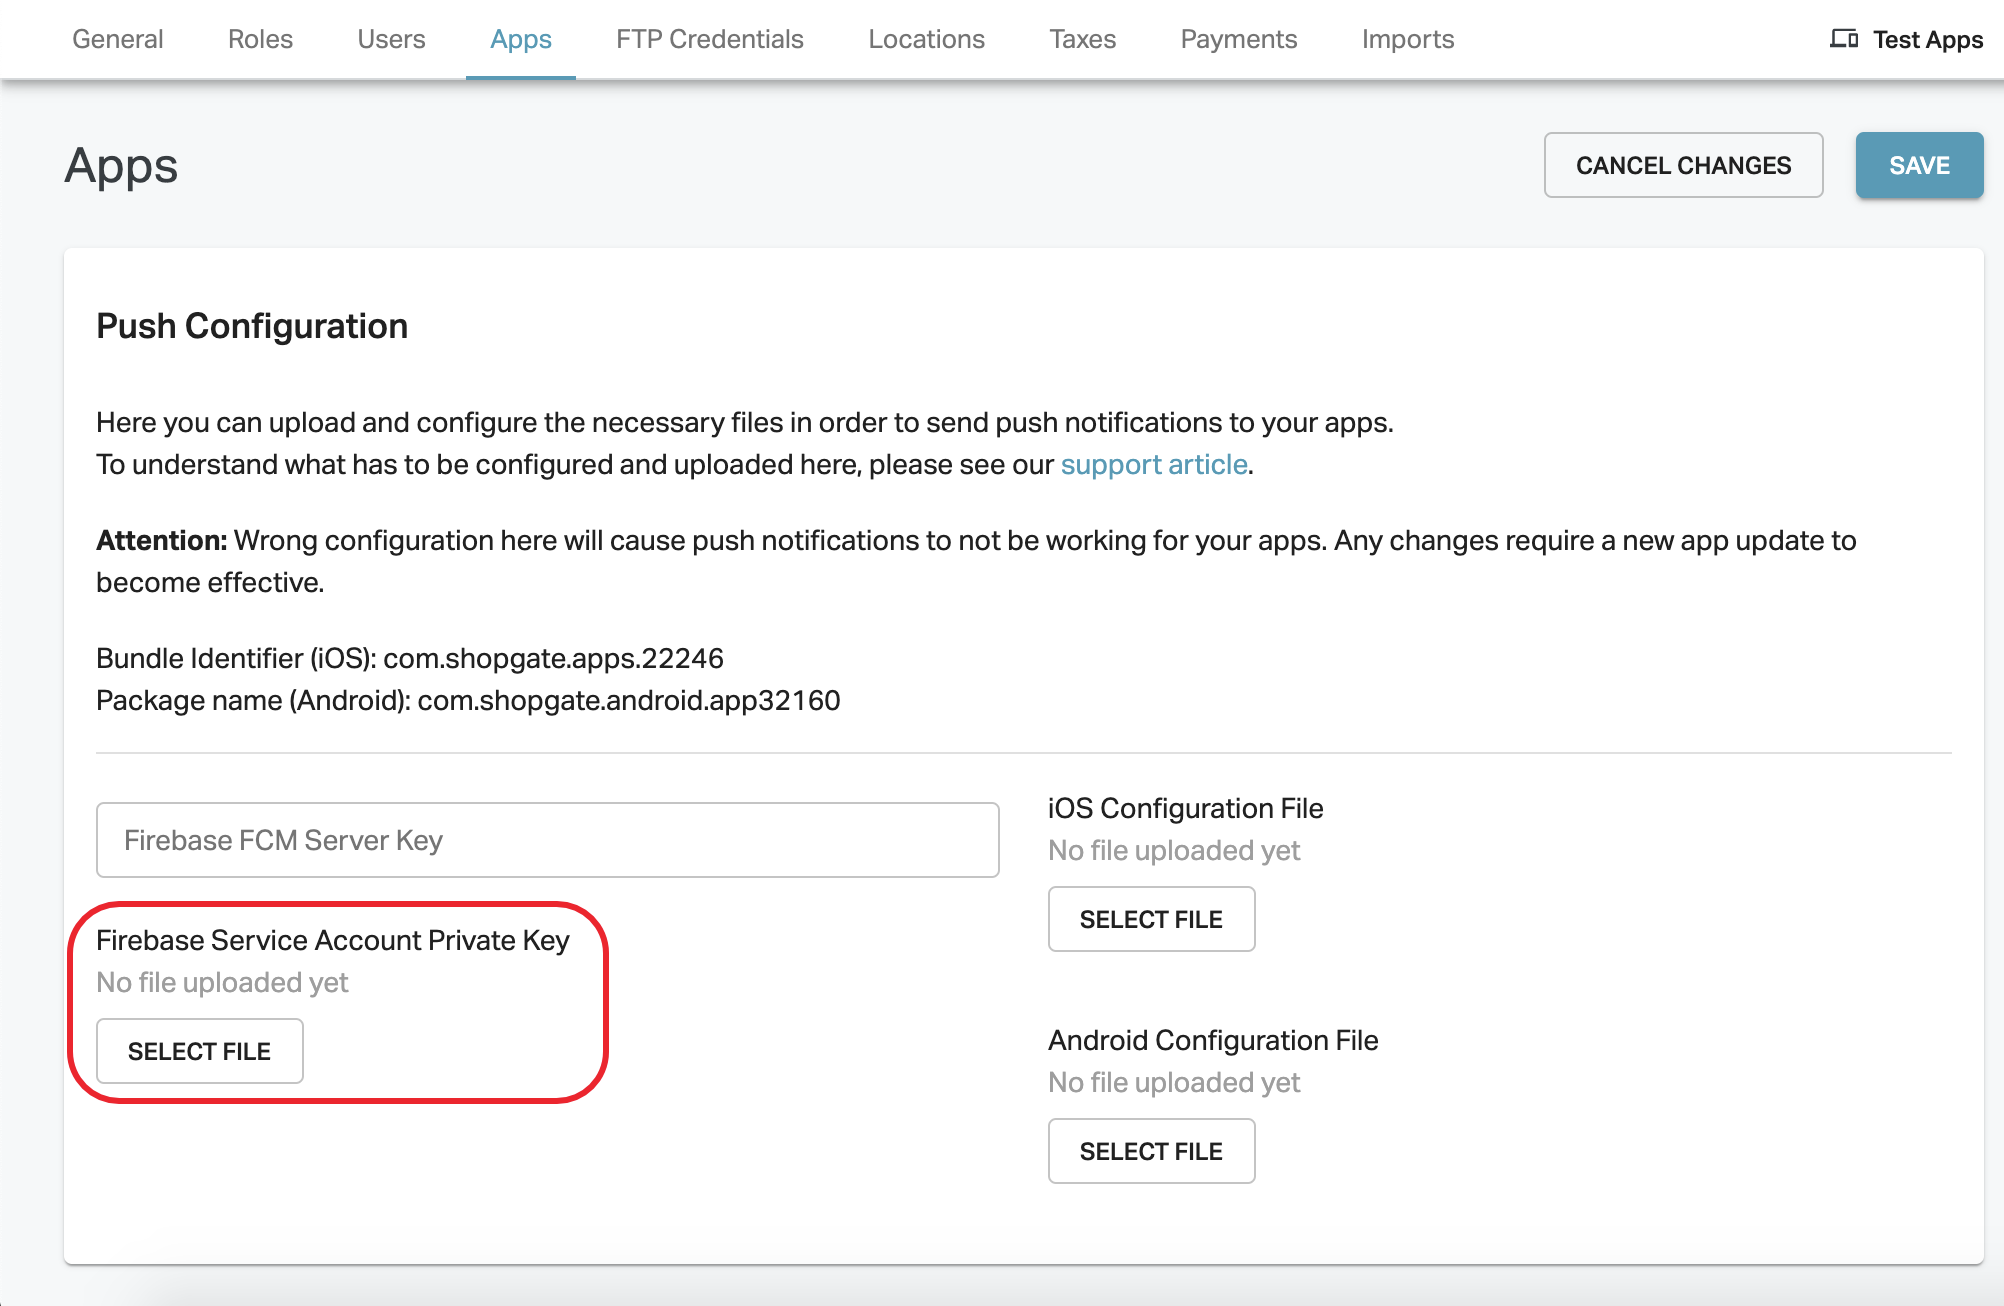
Step 4: iOS Configuration File
In the Shopgate Admin, copy the Bundle Identifier (iOS) to your clipboard.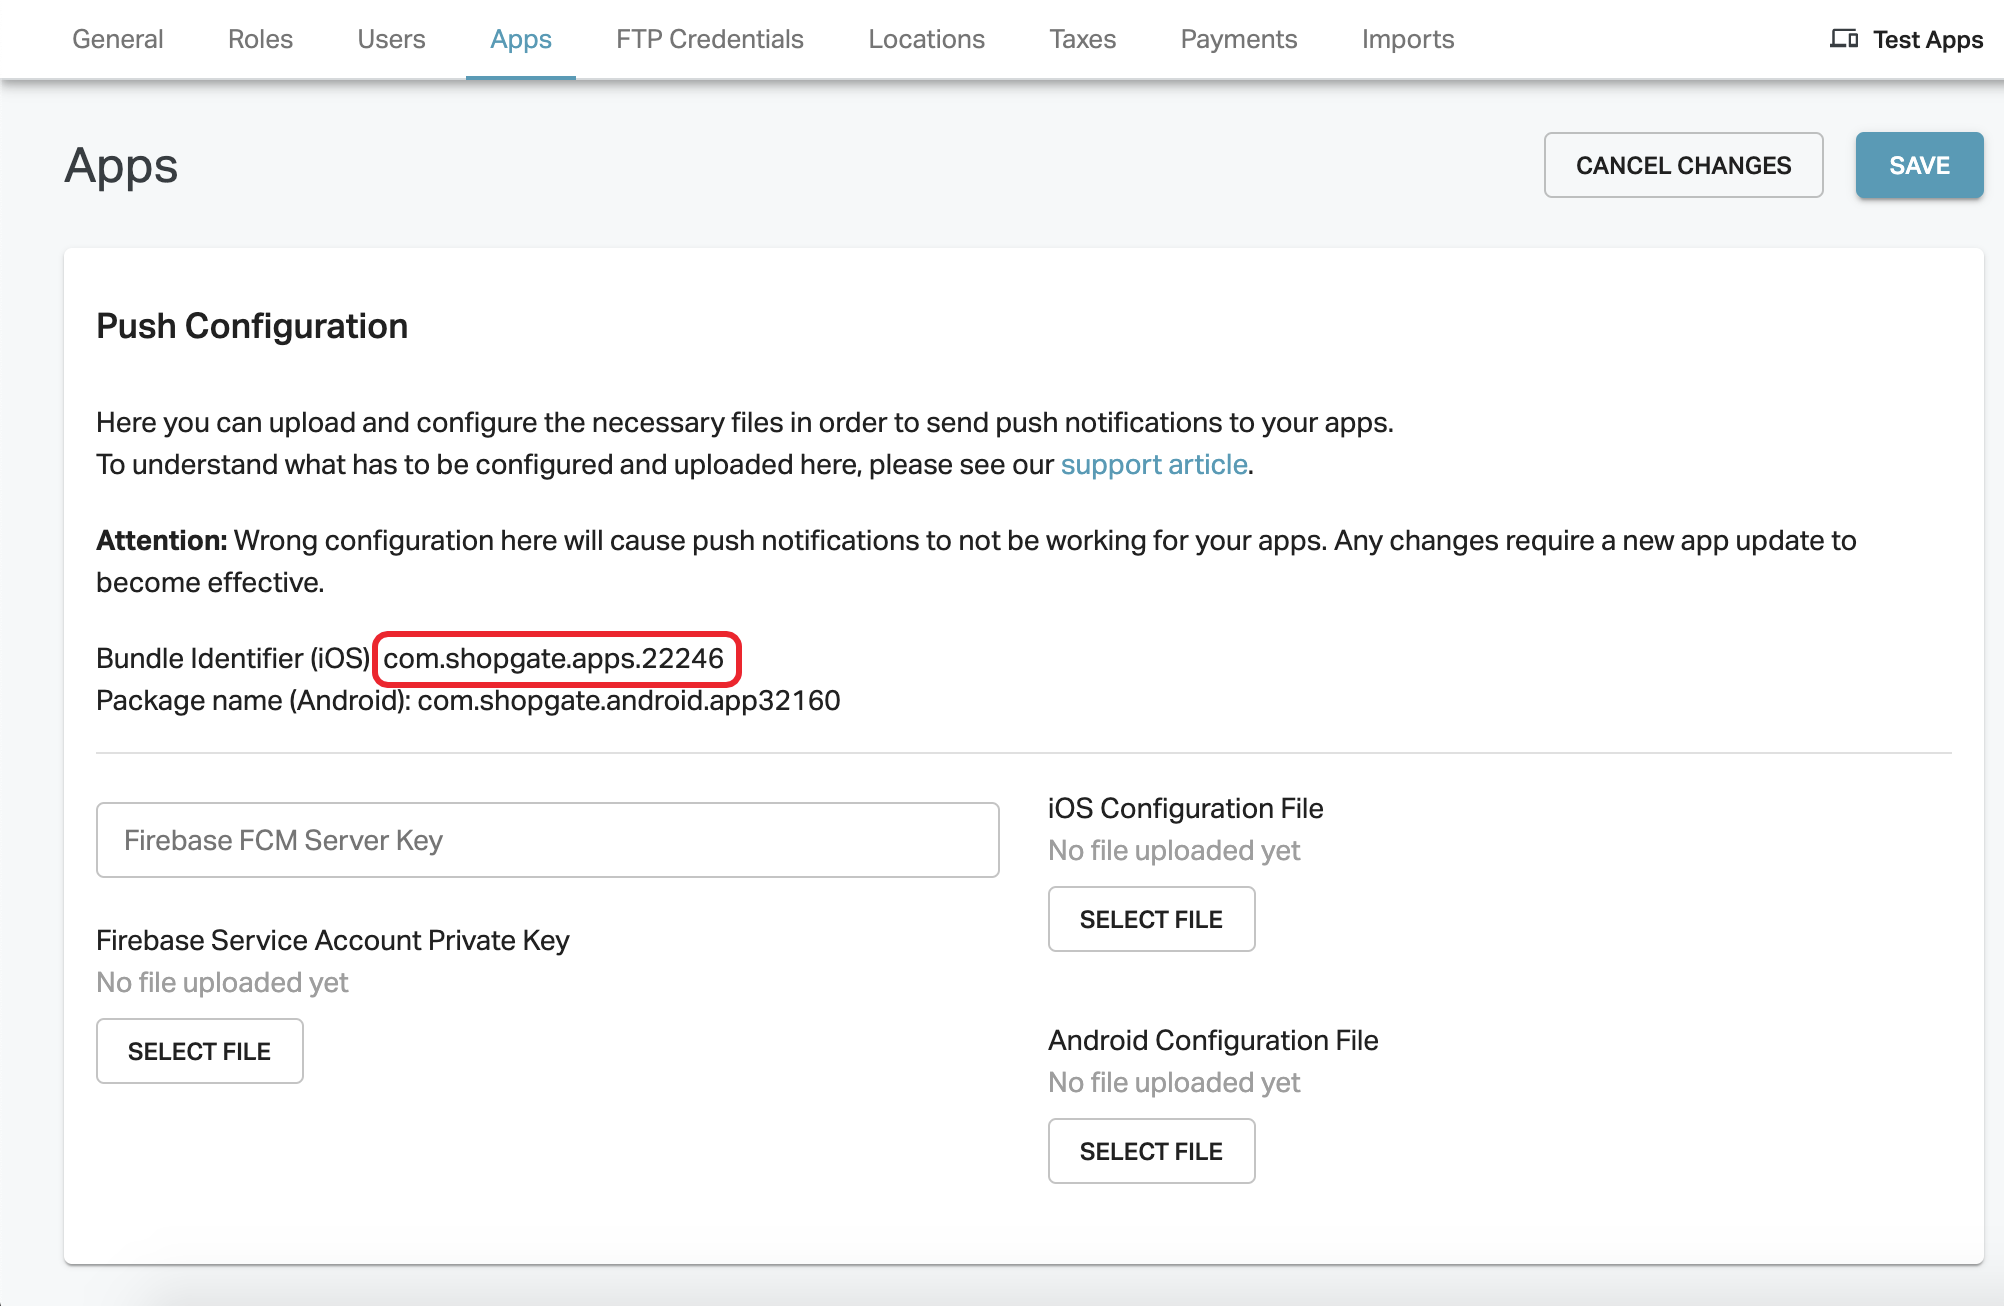
In the Project Settings in the Firebase console, click on the "General" tab. Then scroll down and click on the button "iOS" at the bottom to connect the iOS app with the Firebase project.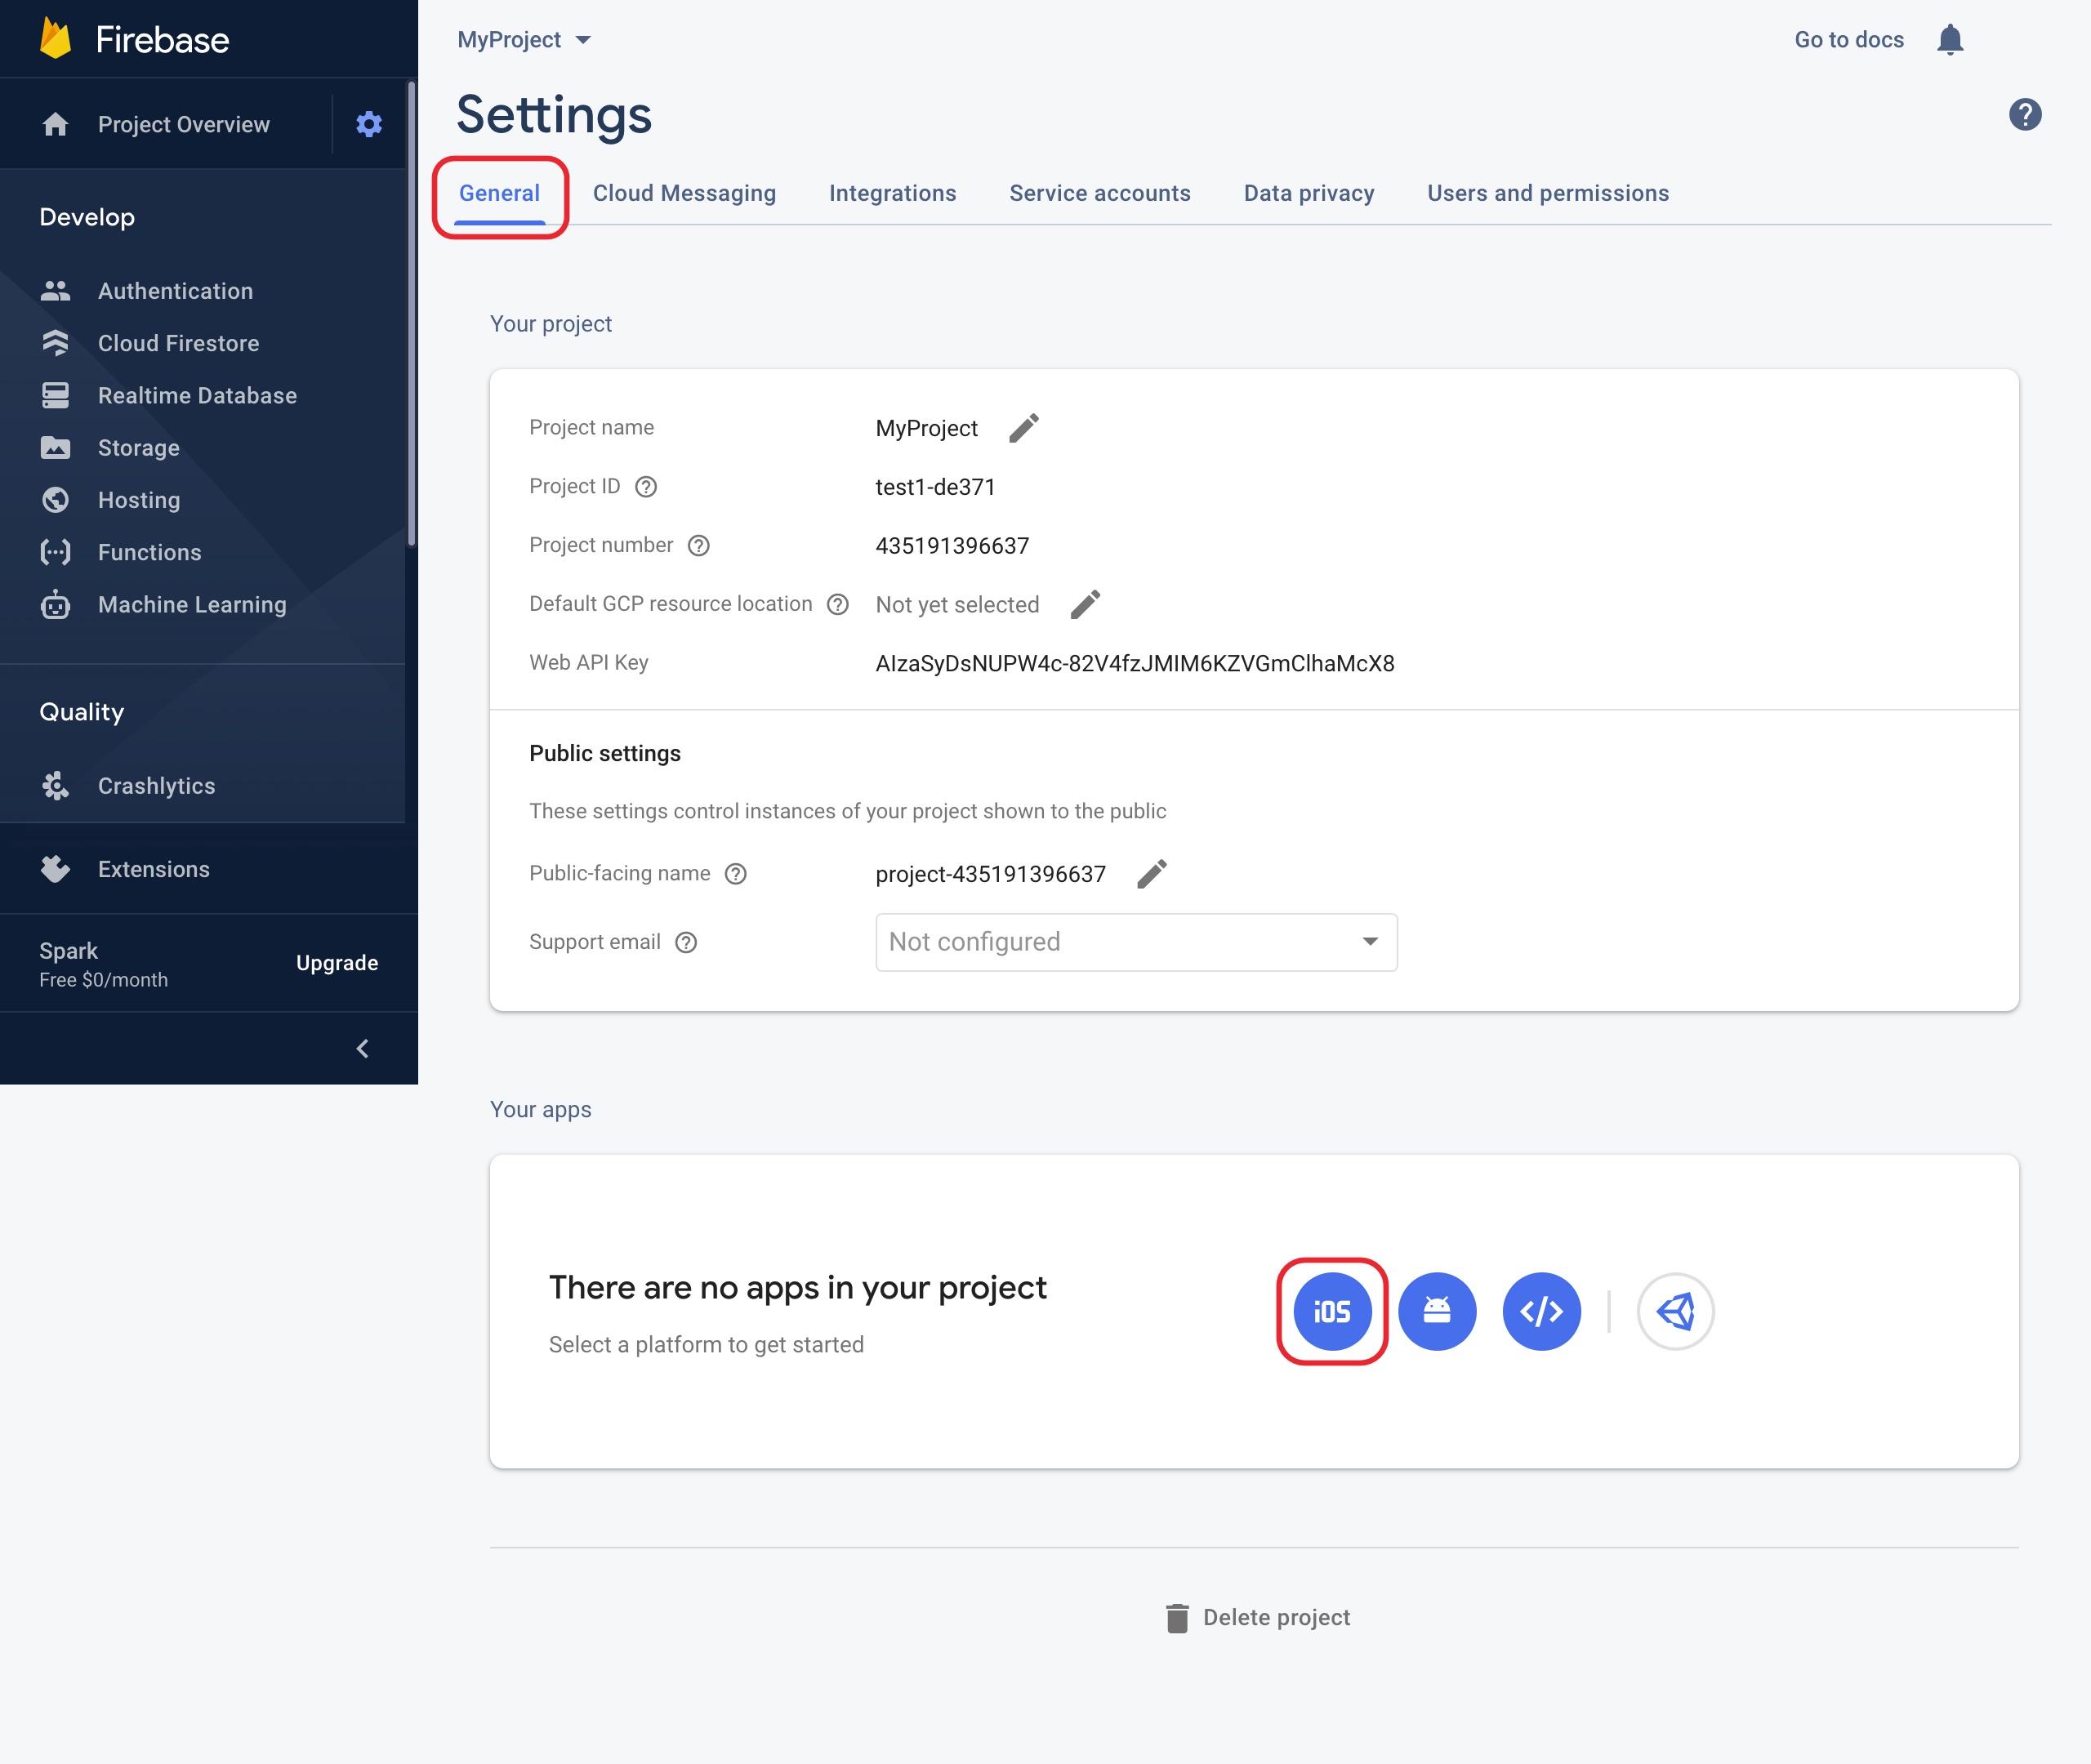
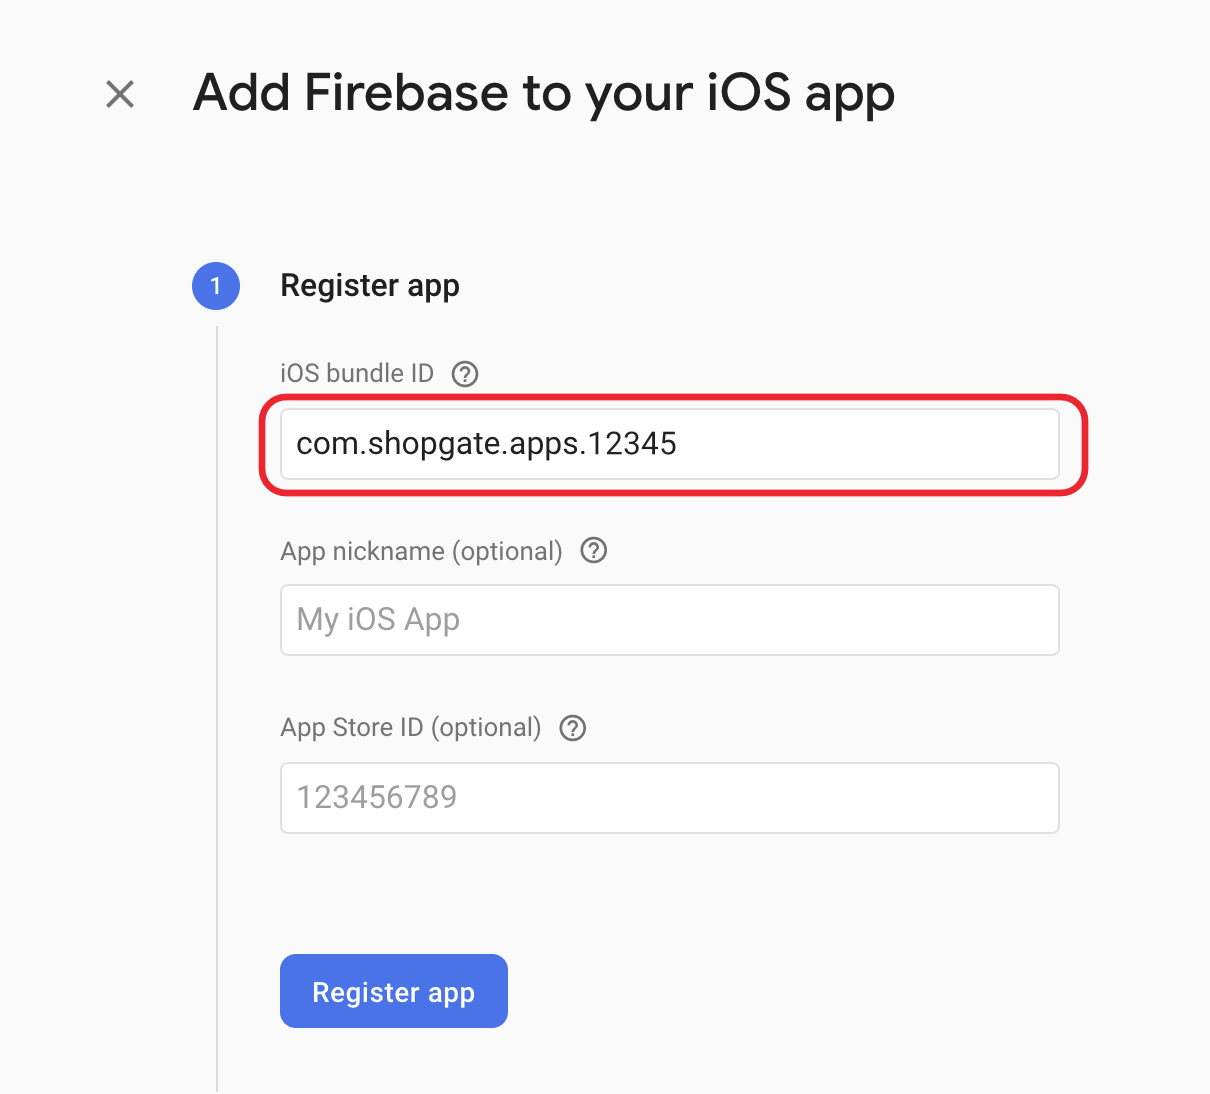
Paste the Bundle Identifier that you copied into the field "iOS bundle ID". Optionally fill out the App nickname and App Store ID. Then press "Register app"
 Download the configuration file onto your computer.
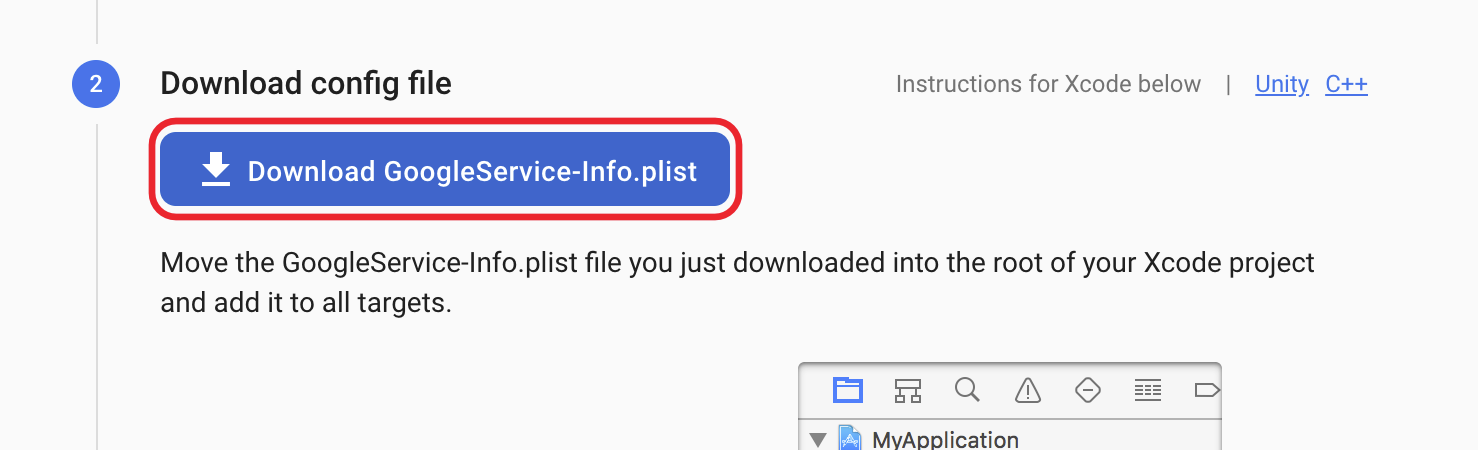
In the Shopgate Admin, upload the configuration file you just downloaded to the field "iOS Configuration File". Click Save on top right.

In the Firebase console, you do not need to follow the instructions that are shown there, Shopgate will take care of that for you. Just click "Next" for Steps 2, 3 & 4 and "Skip this step" on step 5, to finish the configuration of your iOS app.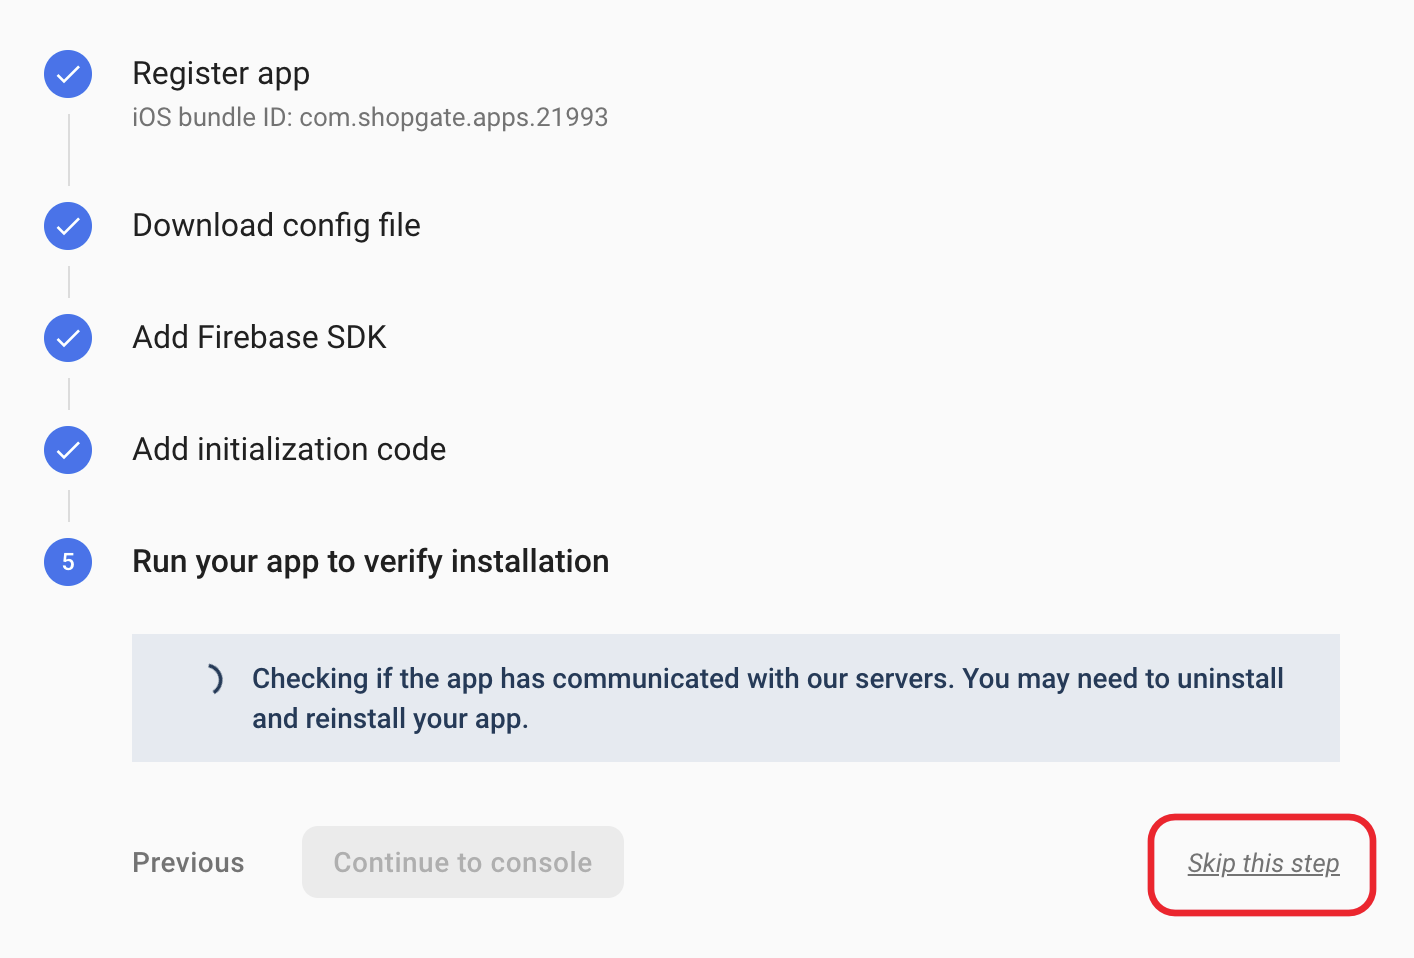
Step 5: Android Configuration File
In the Shopgate Admin, copy the Package name (Android) to your clipboard.
In the Project Settings in the Firebase console, click on the "General" tab. Then scroll down and click on the button "Add app" on the right. In the popup that opens, click on the Android button to connect your Android app with the Firebase project.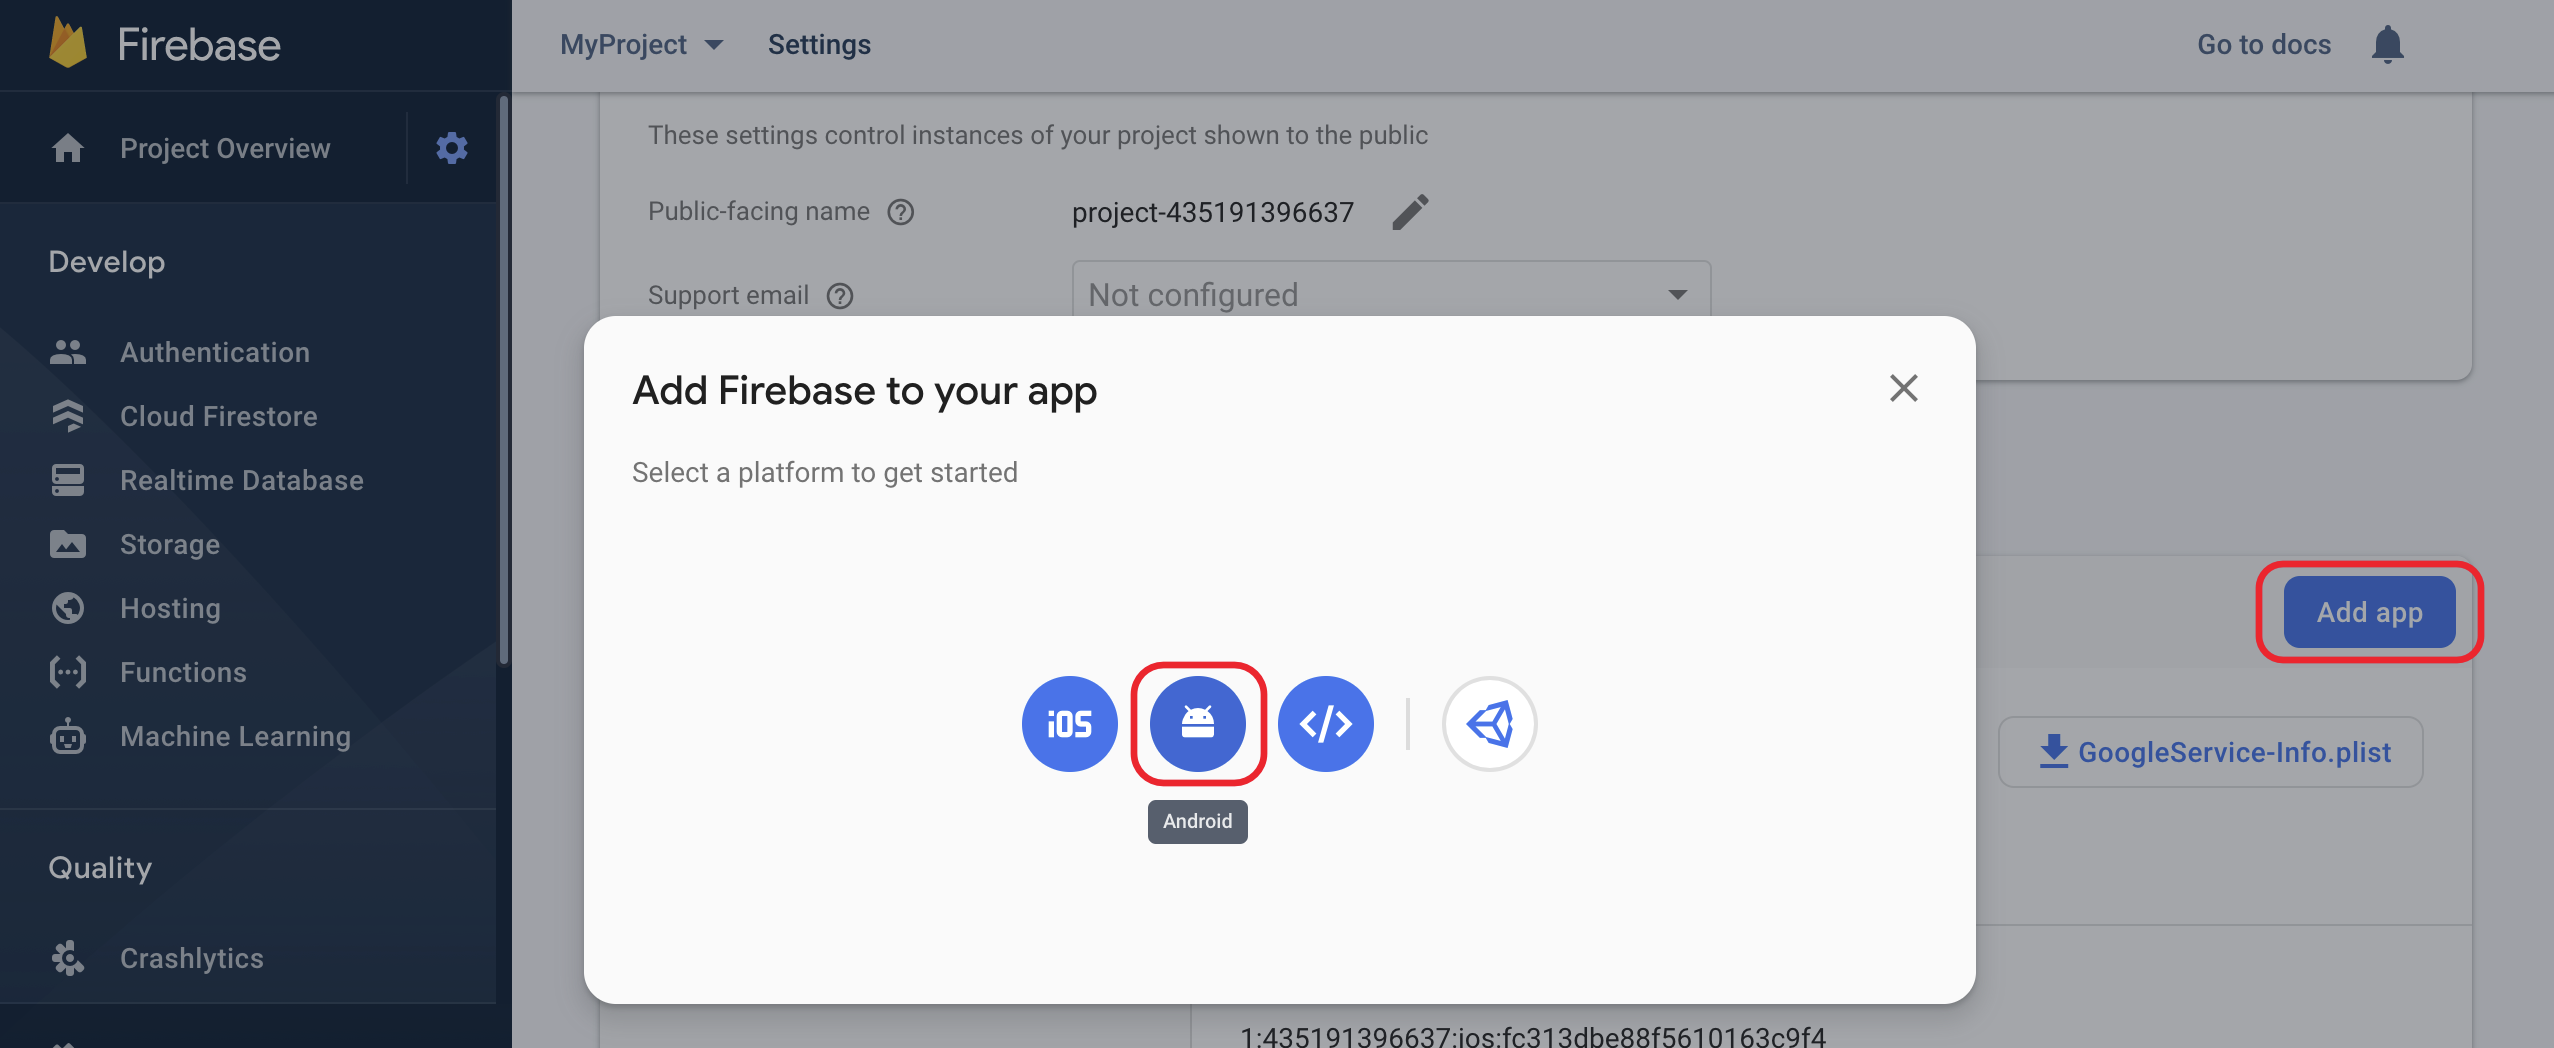
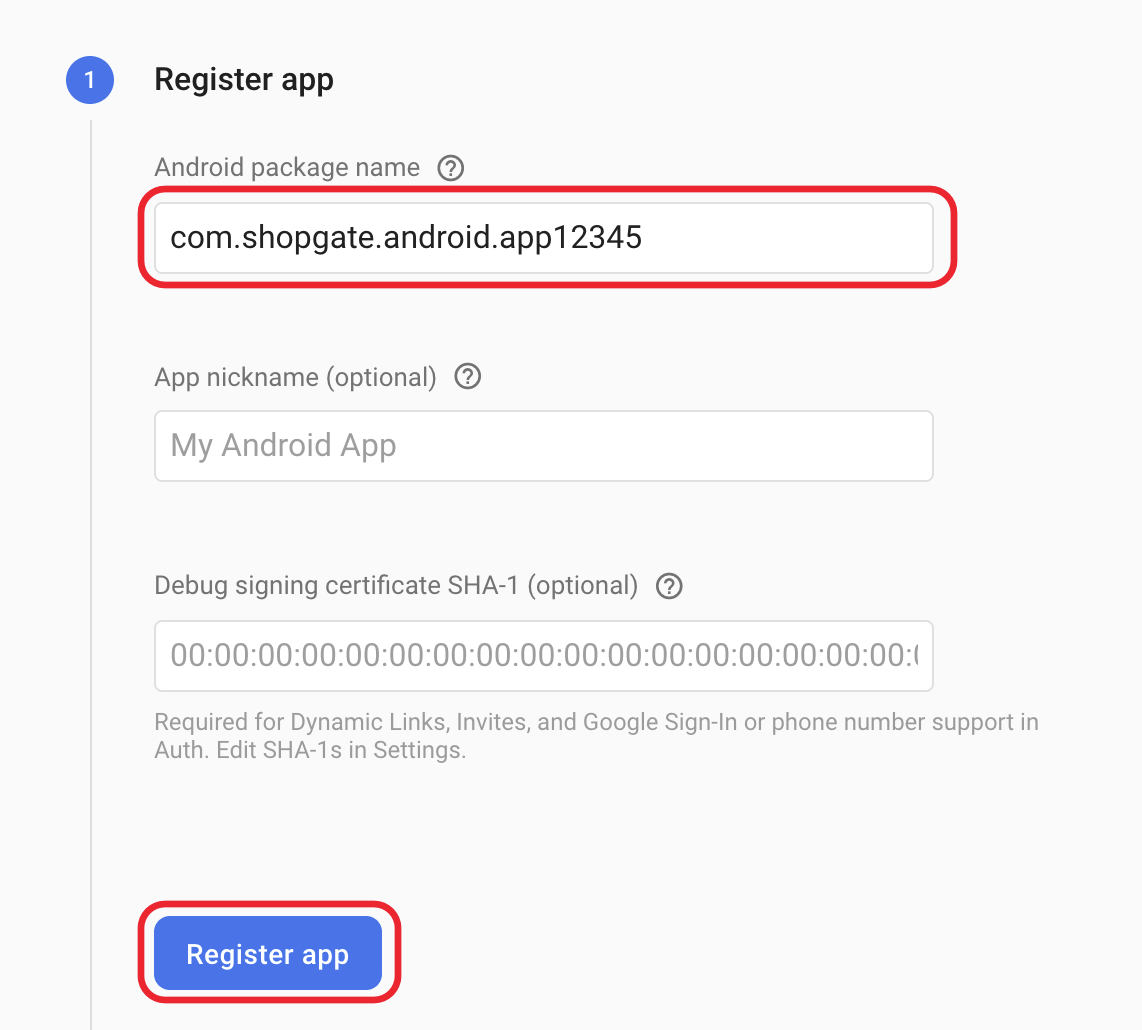
Paste the Bundle Identifier that you copied into the field "Android package name". Optionally fill out the App nickname. The "Debug signing certificate" can be left empty. Click on "Register App".
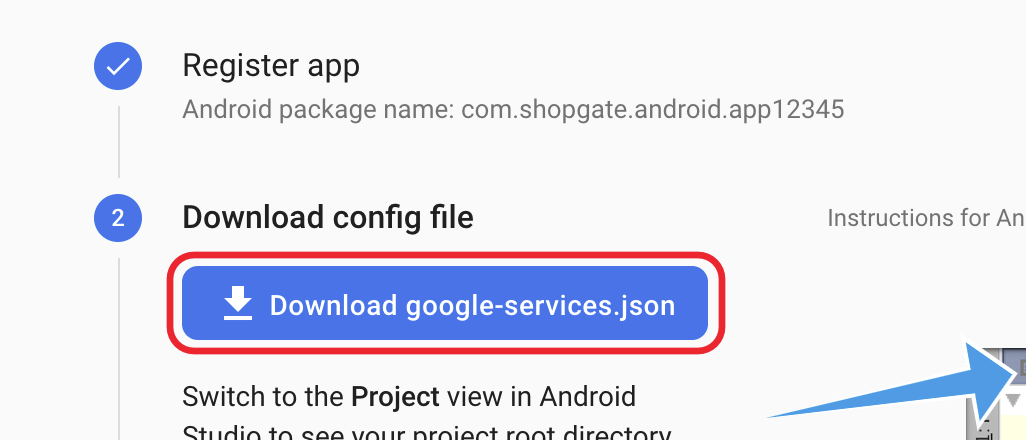
Download the configuration file to your computer.
In the Shopgate Admin, upload the configuration file you just downloaded to the field "Android Configuration File". Click Save on top right.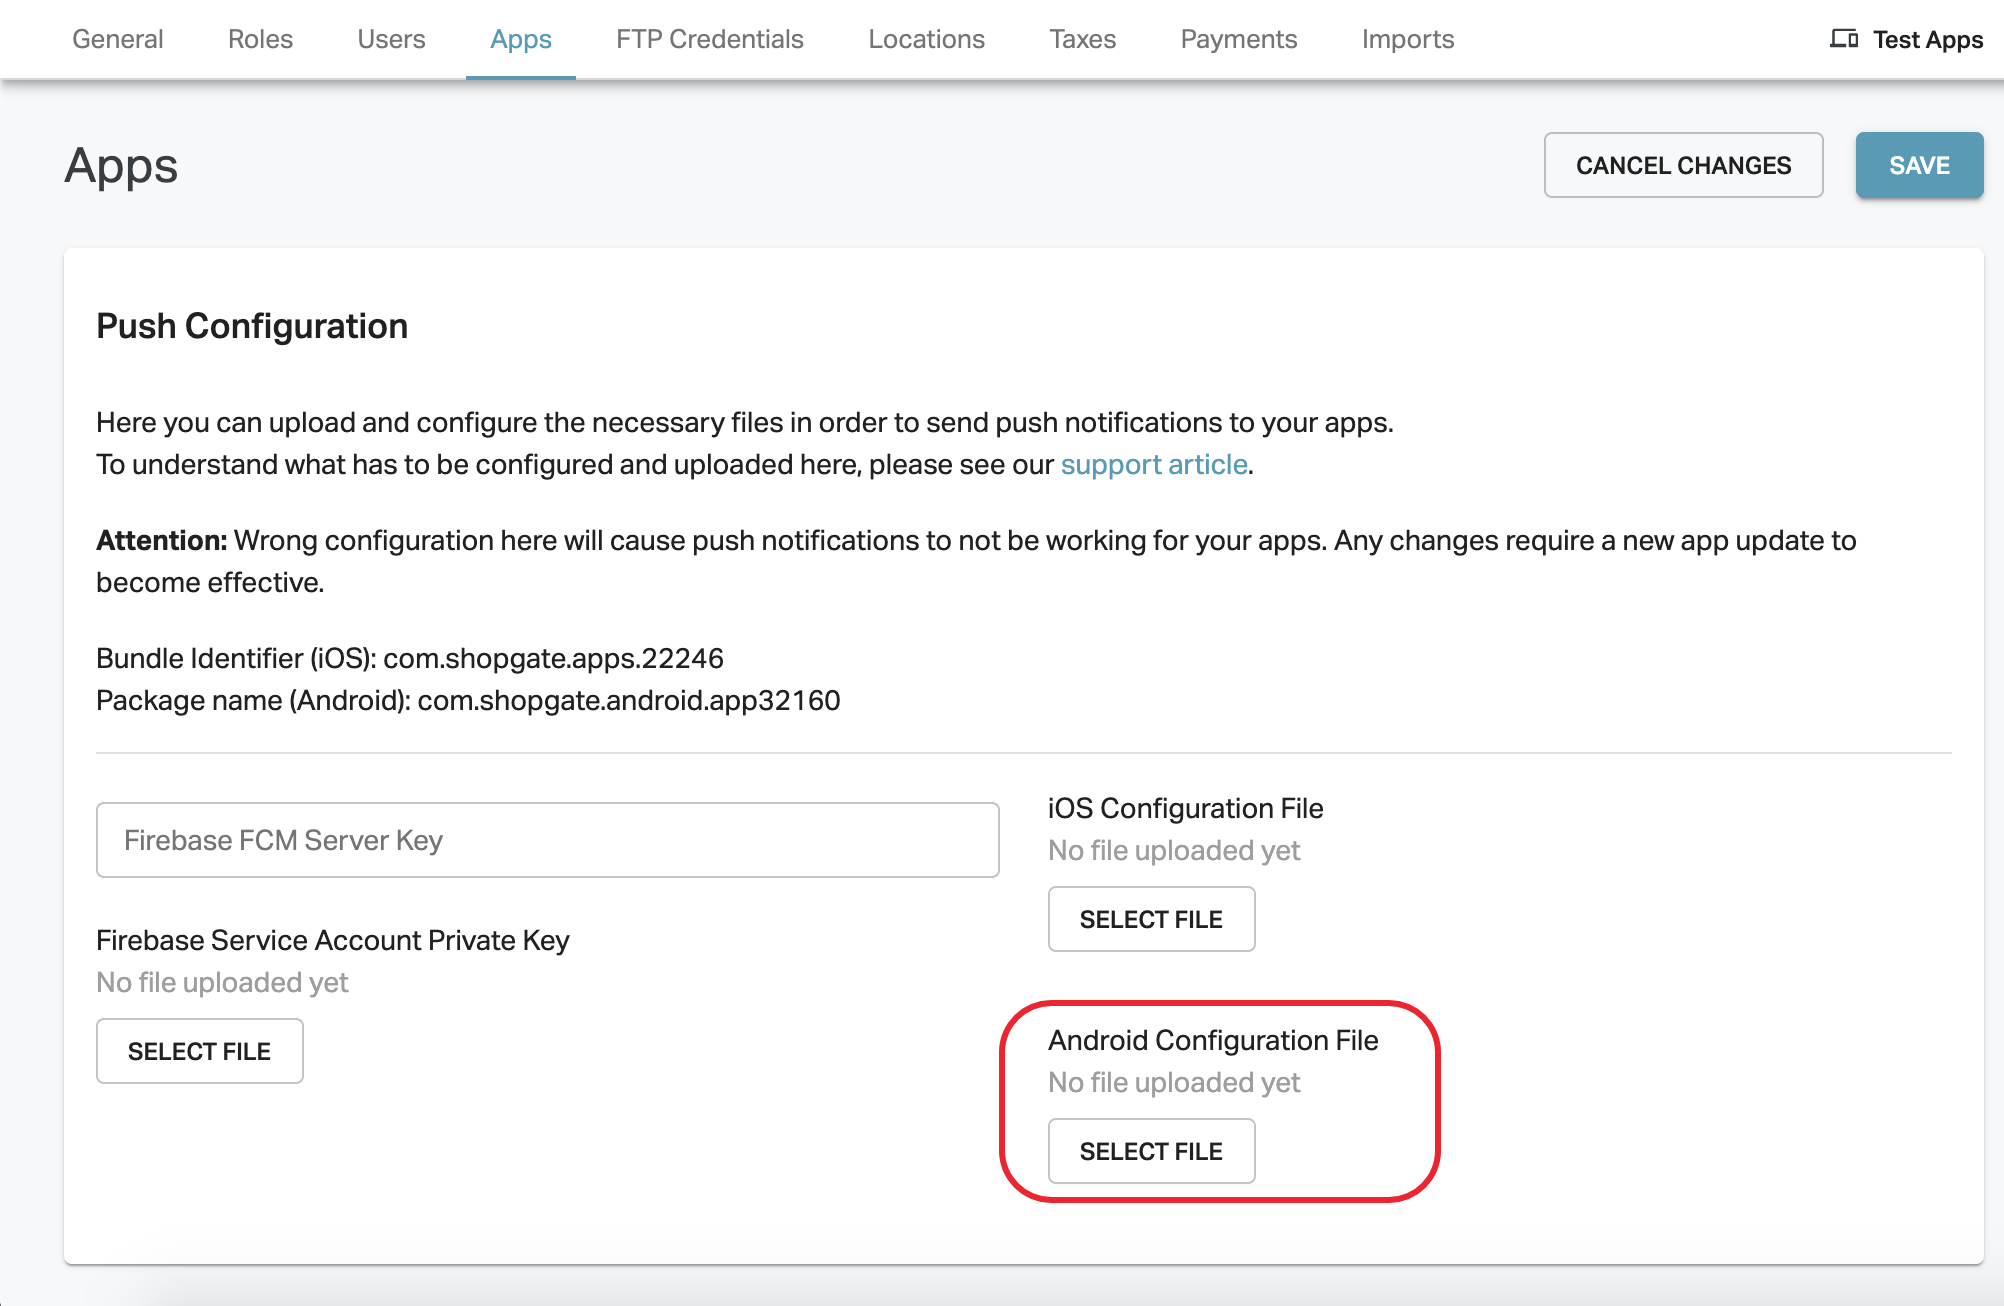
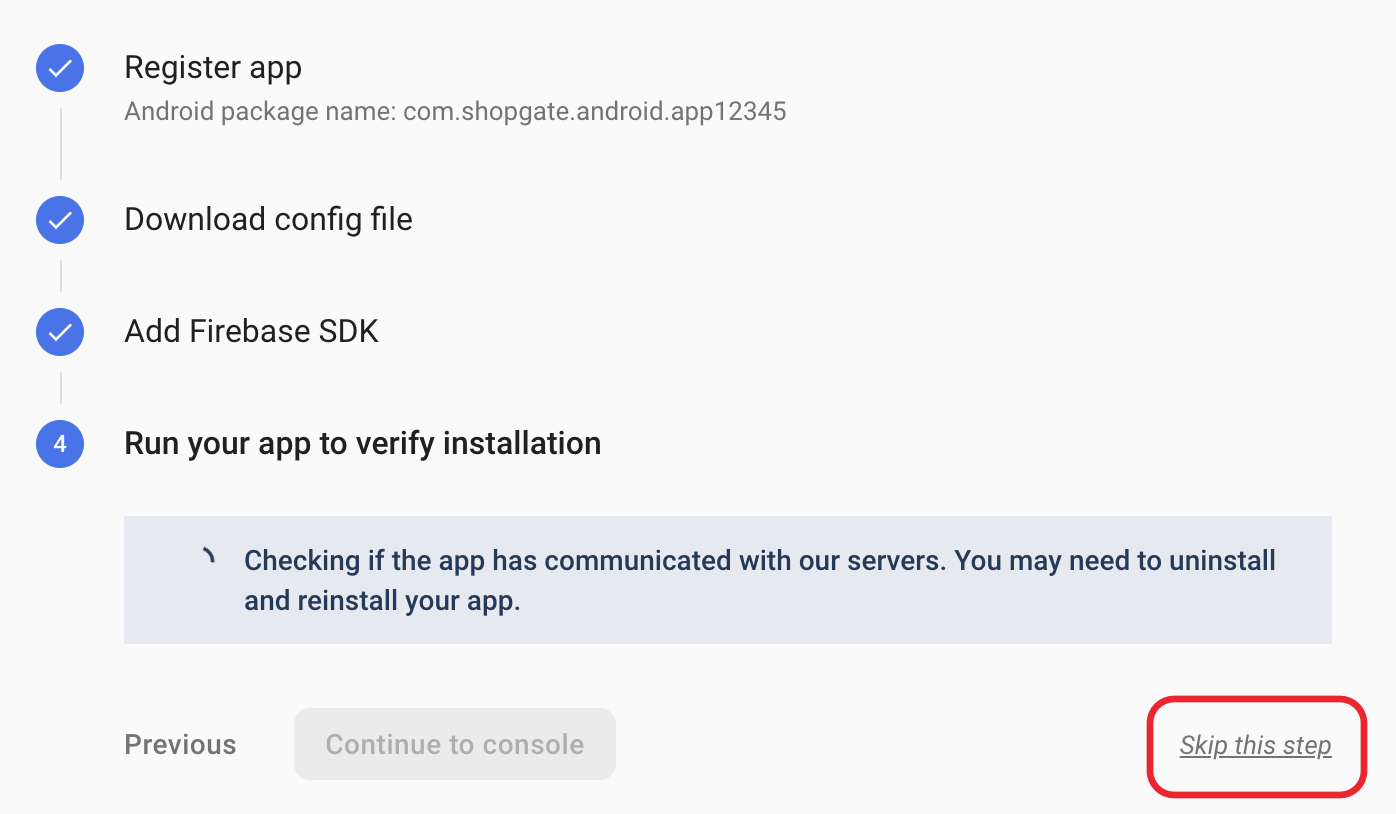
In the Firebase console, you do not need to follow the instructions that are shown there, Shopgate will take care of that for you. Just click "Next" for Steps 2 & 3 and "Skip this step" on step 5, to finish the configuration of your iOS app.
You are all done! Your app should now be configured to be able to send & receive push notifications.
If your app is already uploaded to the App Store / Google Play store, please be aware that an update of the app is required for any changes to apply.