| Verfügbar für folgende Plattformen: | |||
| Shopgate Connect | ✔ | Shopgate Go | ✔ |

The entries can be linked to a page you created in the Shopgate Admin (previously referred to as a CMS page), an FAQ page, store locations page, and a form to subscribe to your shop's newsletters. For older accounts that use catalogs, you can also link your catalogs in the "More" menu.
Where can my customers see the "More" menus?
"More" menu entries will show on both the mobile apps and website.
| In the app | On the mobile website |
|
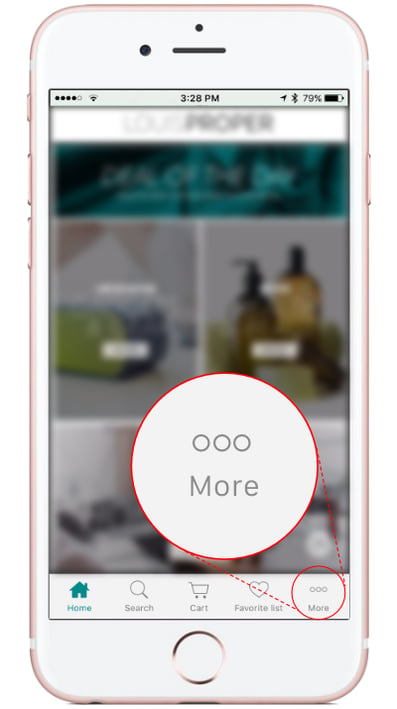
The entries can be accessed via the "More" icon at the bottom right (iOS) or via the  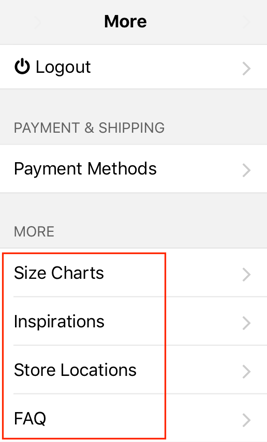
|
The entries are shown directly on the homepage near the bottom.  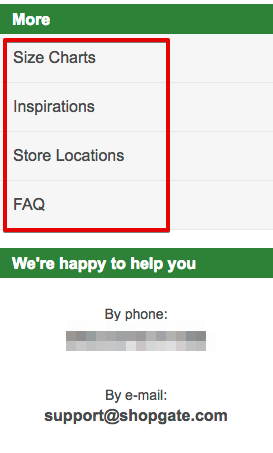
|
 symbol in the upper left corner (Android).
Add a menu entry
To start adding an entry, follow these steps:
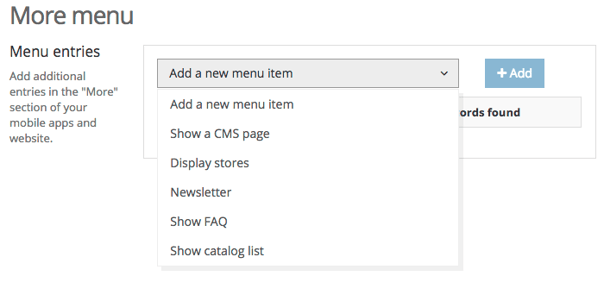
- Log into your Shopgate Admin and navigate to Design → More menu.
- Select an entry from the drop-down list and click +Add. If you haven't already created the content to link to the entry, you will be guided to do so.

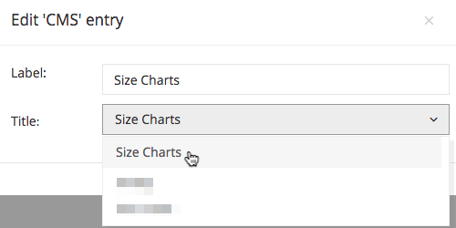
Link to a page
You can link an entry to any page* you created with the Shopgate widget system.
| Steps to create |
To link to a page, follow these steps:
|
| Where to configure |
You can create a page in your Shopgate Admin:
For more information, read how to create a mobile page with widgets |

Store locations
With this entry, your customers can easily navigate to your physical store(s) using an existing map app on their smartphone. On each location, you can enter store hours, an address, contact details, social media, and more.
| Steps to create |
To link to your store locations, follow these steps:
|
| Where to configure |
You can create or edit a store location in your Shopgate Admin under Settings → Store Finder. For more information, read how to list store locations in your mobile shop. |
FAQ list
| Steps to create |
To link to your FAQ page, follow these steps:
|
| Where to configure |
You can create or edit a list of questions and answers in your Shopgate Admin under Settings → FAQ List. |
Newsletter signup form
| Steps to create |
To link to your newsletter signup form, follow these steps:
|
| Where to configure |
You can create or edit your signup form in your Shopgate Admin under Marketing → Newsletter. |
Catalogs (older accounts only)
| Steps to create |
To link to your catalog list, follow these steps:
|
| Where to configure |
Catalogs are no longer available in your Shopgate Admin. If you are using an older account that has this feature, please contact support@shopgate.com for uploading a new catalog. |
Frequently Asked Questions
What should I do if the menu entries won't show?
If a new menu entry doesn't show up or update immediately, clear your shop cache and the browser cache (Safari on iOS devices and Chrome on Android devices).
If this didn't help, completely quit your app. Wait for 20 minutes or so and restart the app.